
前言
因為在維護公司內部使用的EIP網站時,有些資料呈現,所以我選擇使用datatables
在這邊紀錄一下快速顯示Table的方式
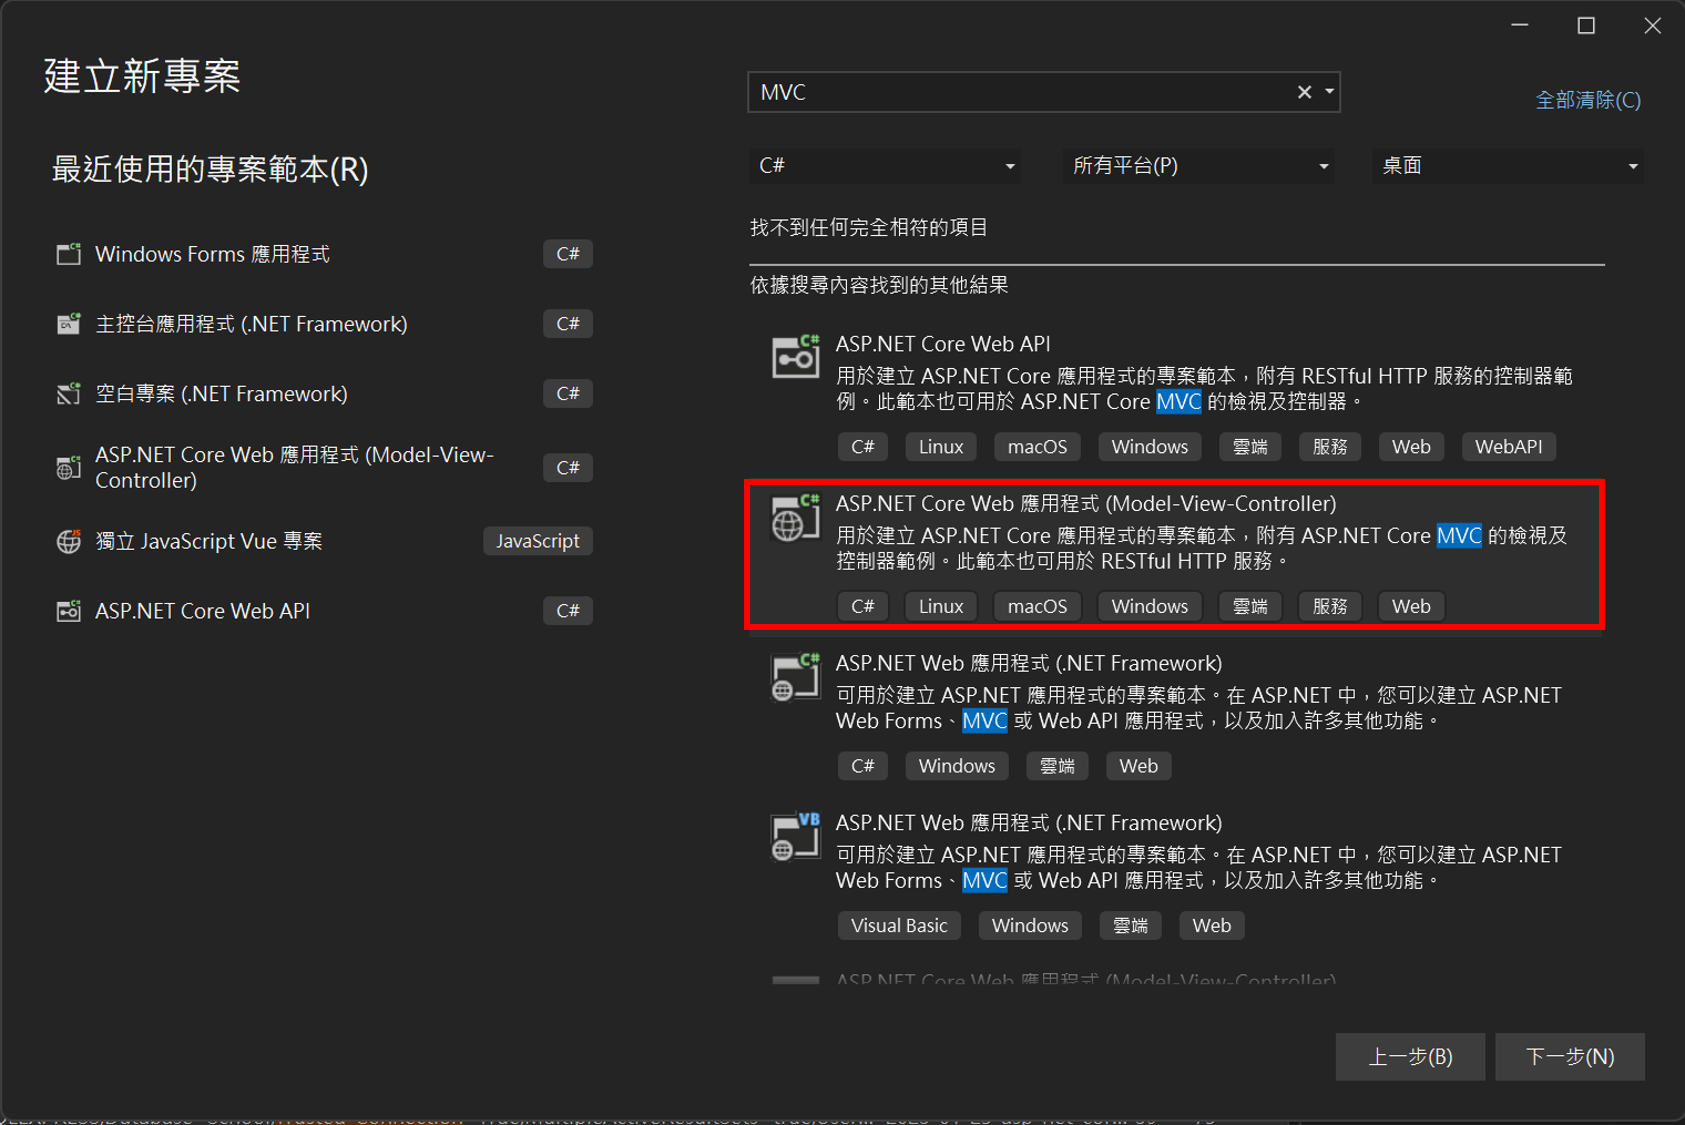
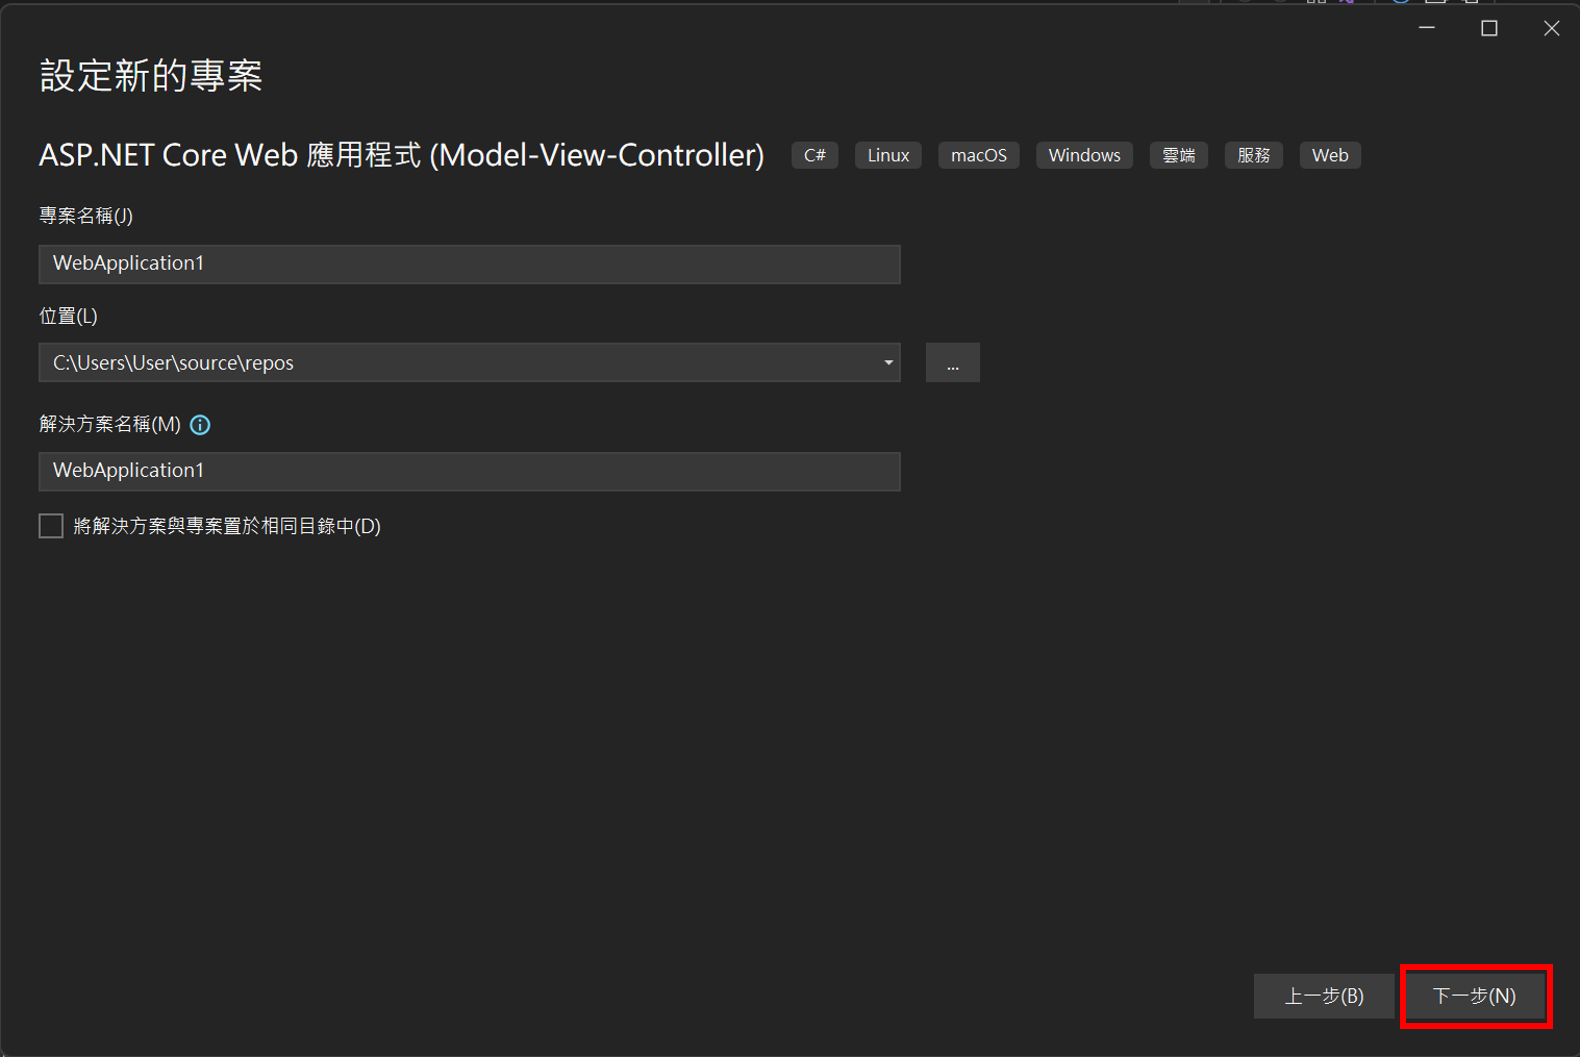
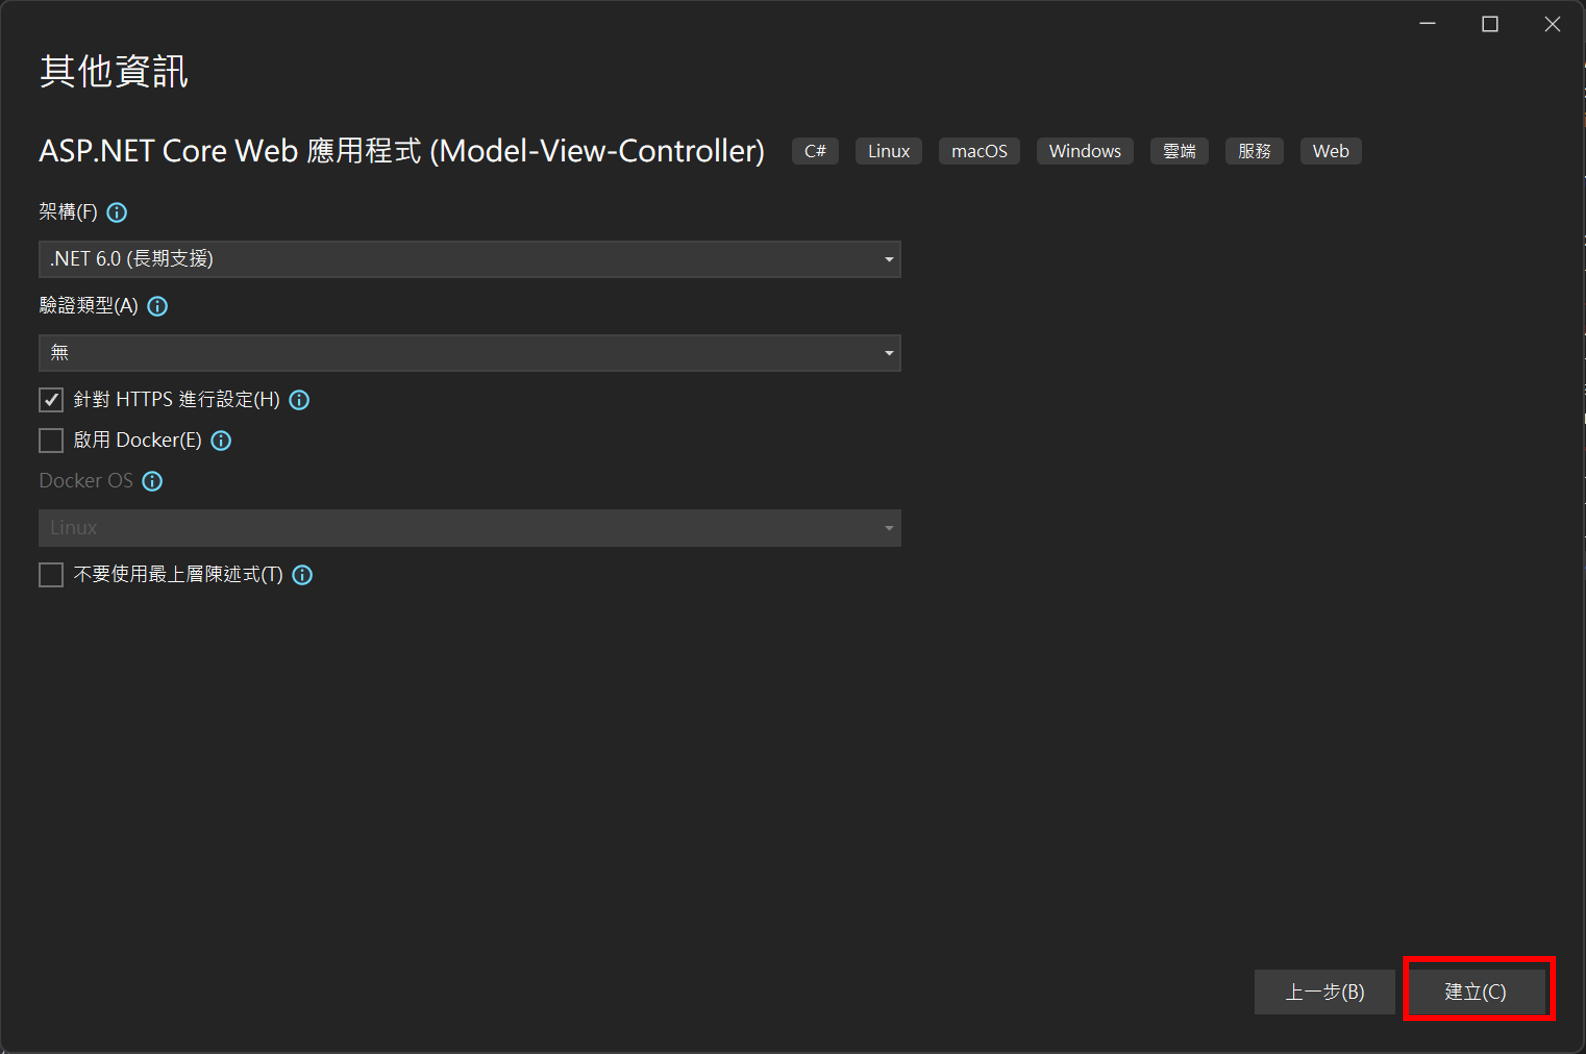
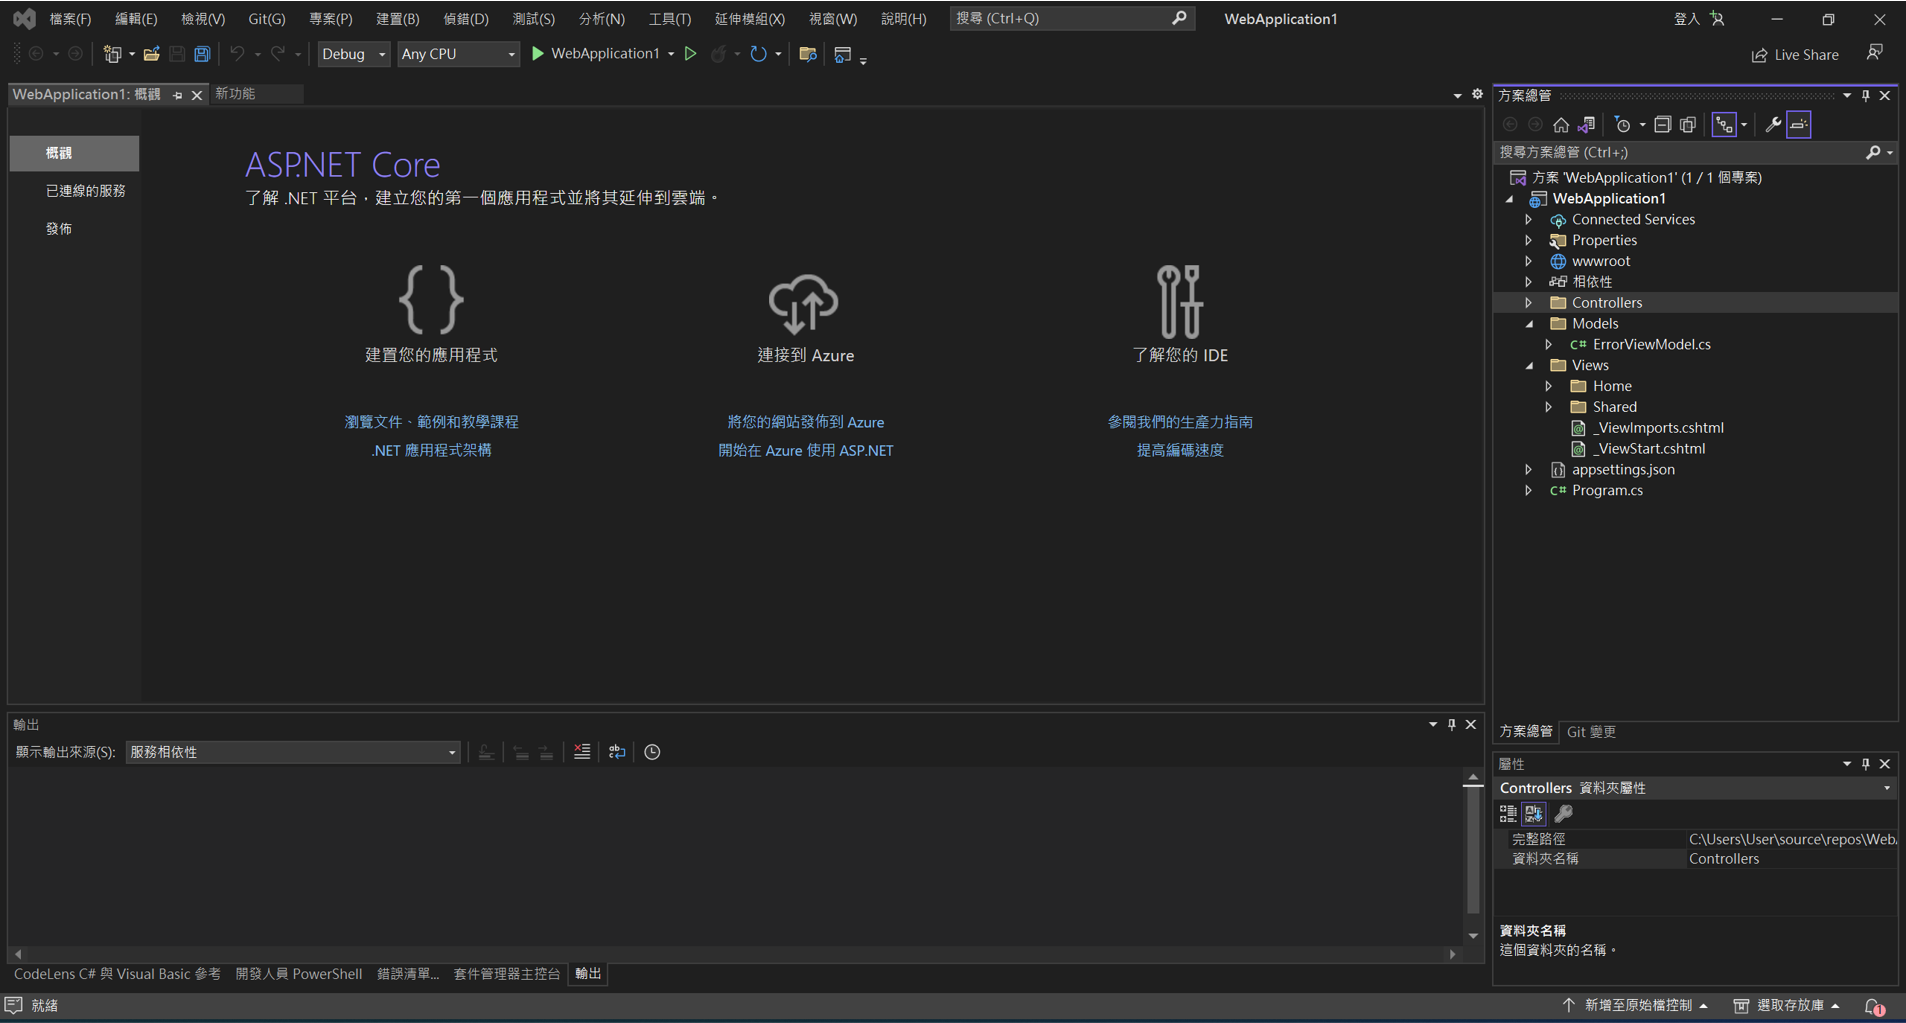
建立ASP.NET CORE專案
這邊以ASP.NET CORE為例
快速設計DataTables
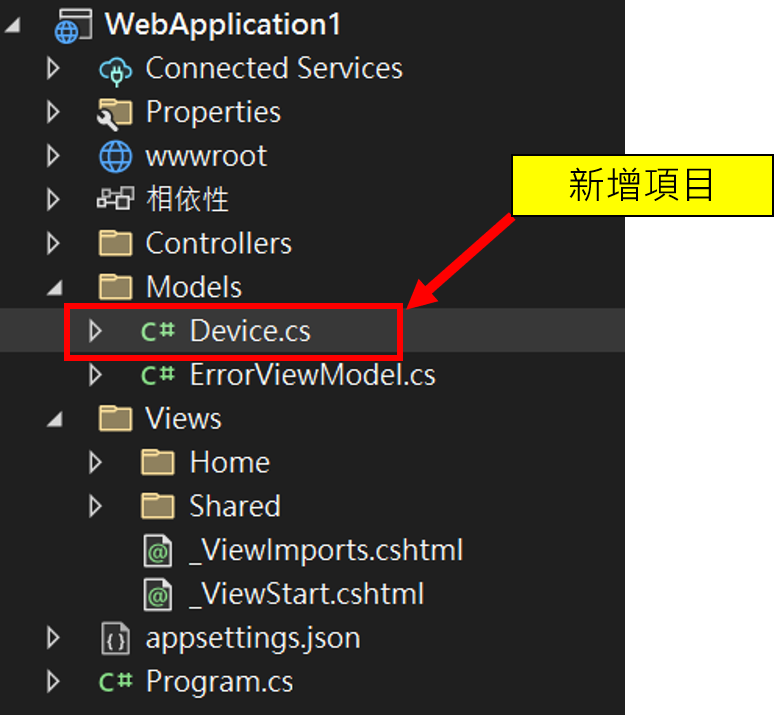
建立Model
新增Model
1
2
3
4
5
6
7
public class Device
{
    public int Id { get; set; }
    public int DeviceTypeId { get; set; }
    public string ItemName { get; set; }
    public string ItemDescription { get; set; }
}
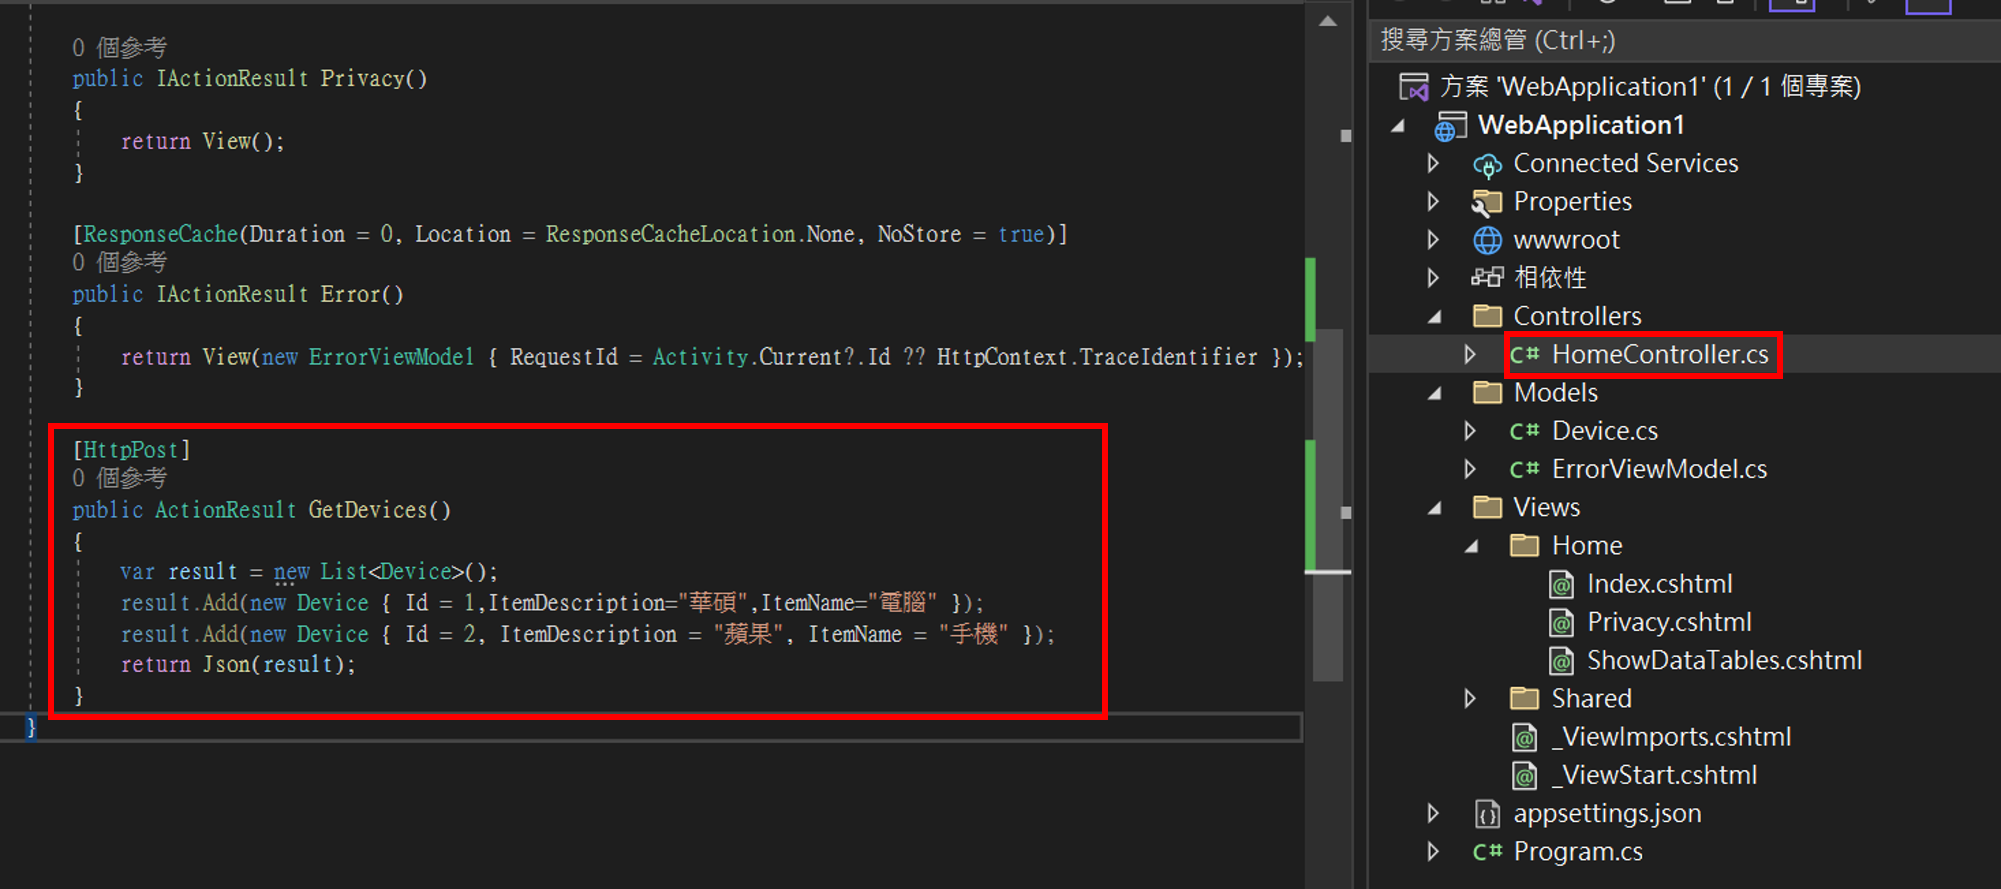
建立Ajax回傳項目
1
2
3
4
5
6
7
8
[HttpPost]
public ActionResult GetDevices()
{
    var result = new List<Device>();
    result.Add(new Device { Id = 1,ItemDescription="華碩",ItemName="電腦" });
    result.Add(new Device { Id = 2, ItemDescription = "蘋果", ItemName = "手機" });
    return Json(result);
}
ASP.Net CORE注意
執行專案前,要在Program.cs設定Json回傳的命名方式 , 若不加入此設定,會因回傳格式導致大小寫不一樣而報錯
如果是ASP.NET Framework 就不會有這問題

1
2
3
4
5
6
builder.Services.AddControllers()
        .AddJsonOptions(options => options.JsonSerializerOptions.PropertyNamingPolicy = null);
builder.Services.AddMvc()
        .AddJsonOptions(options => options.JsonSerializerOptions.PropertyNamingPolicy = null);
builder.Services.AddRazorPages()
        .AddJsonOptions(options => options.JsonSerializerOptions.PropertyNamingPolicy = null);
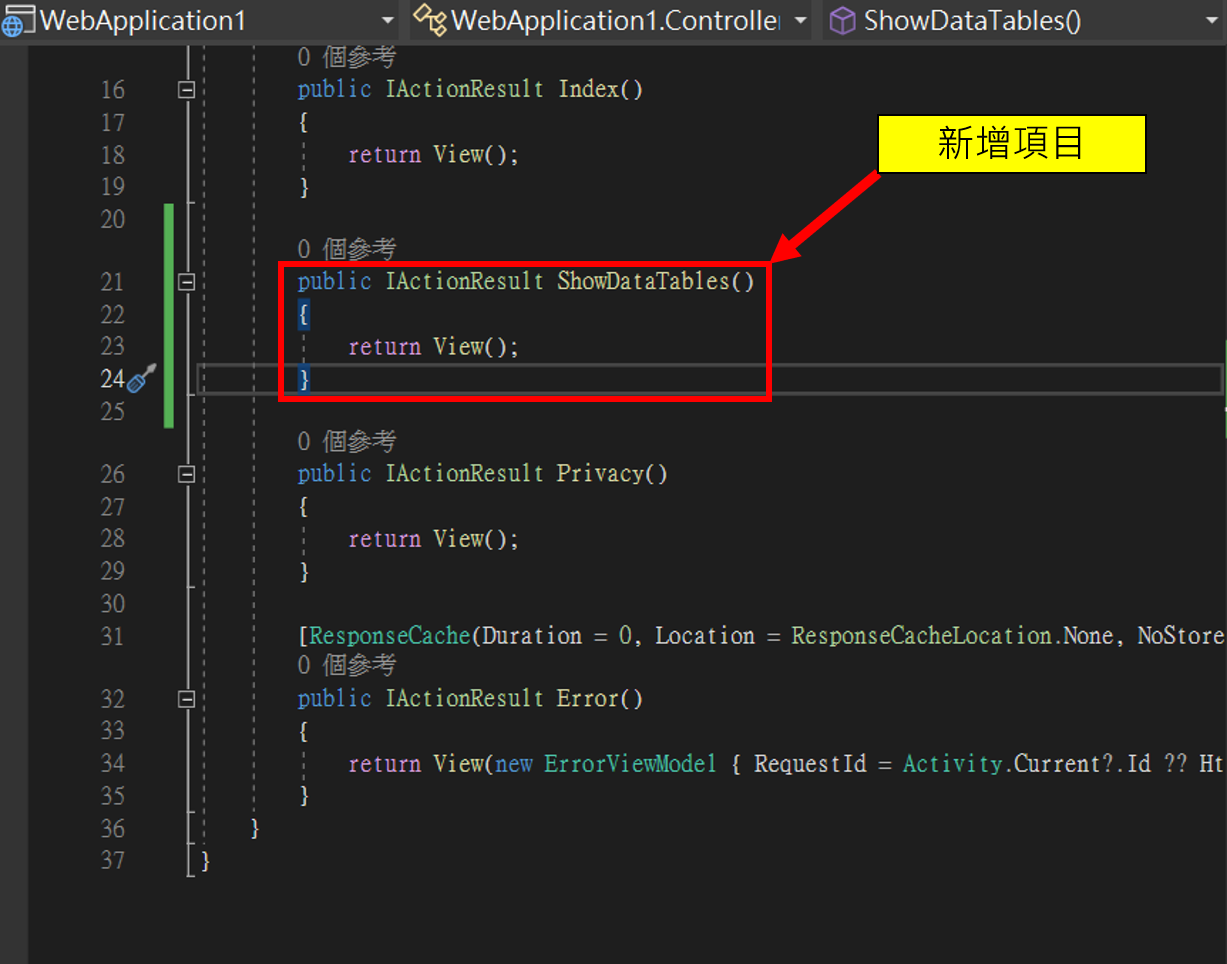
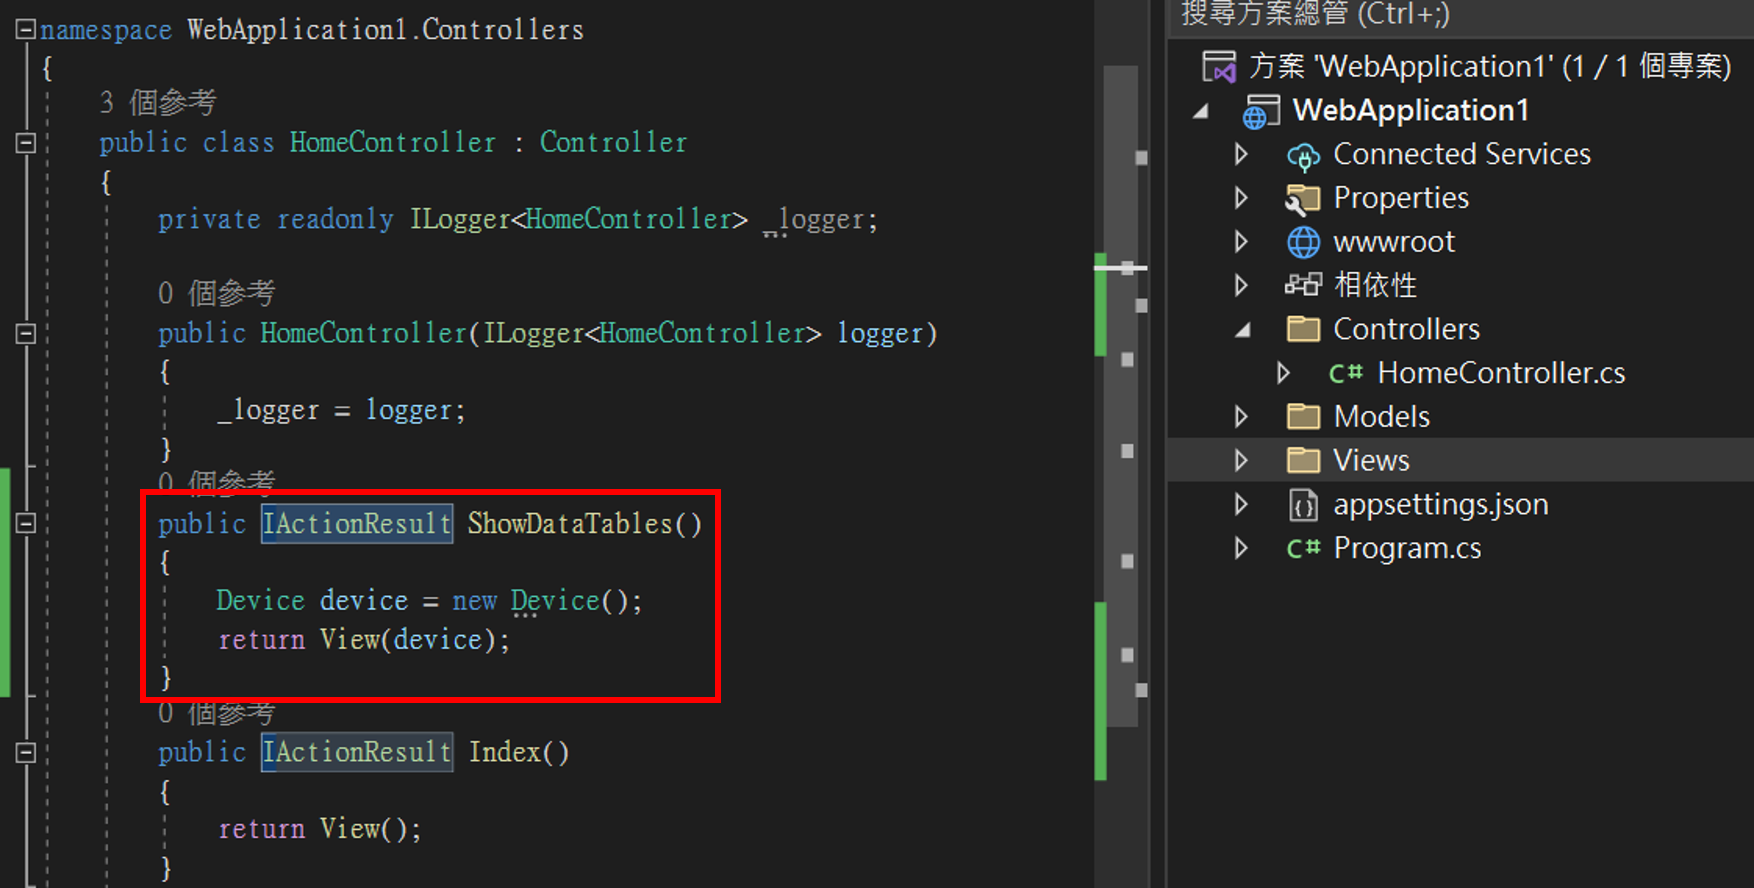
新增ActionResult
1
2
3
4
public IActionResult ShowDataTables()
{
    return View();
}
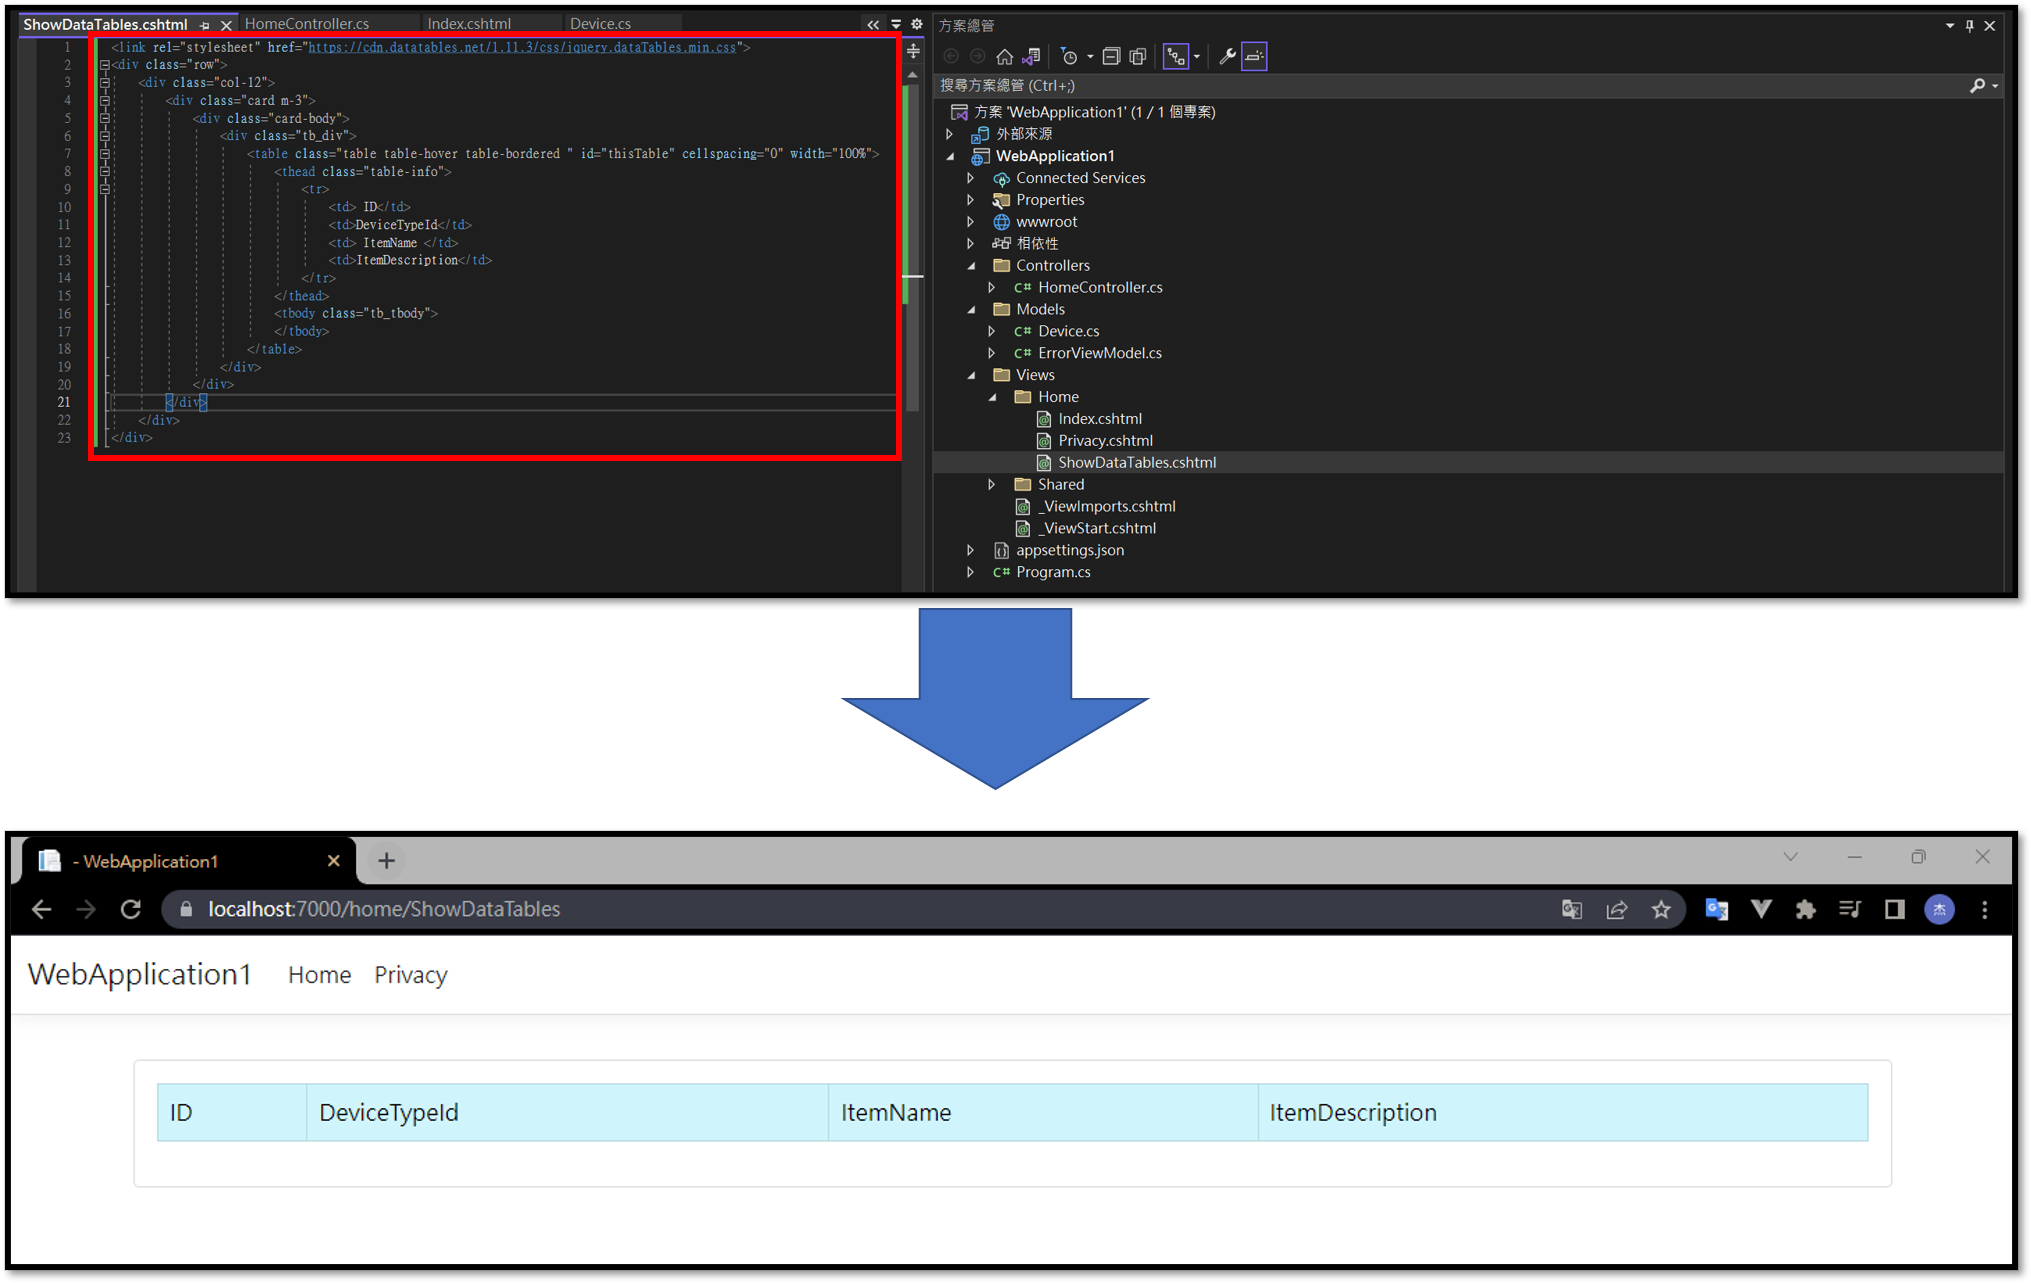
建立View
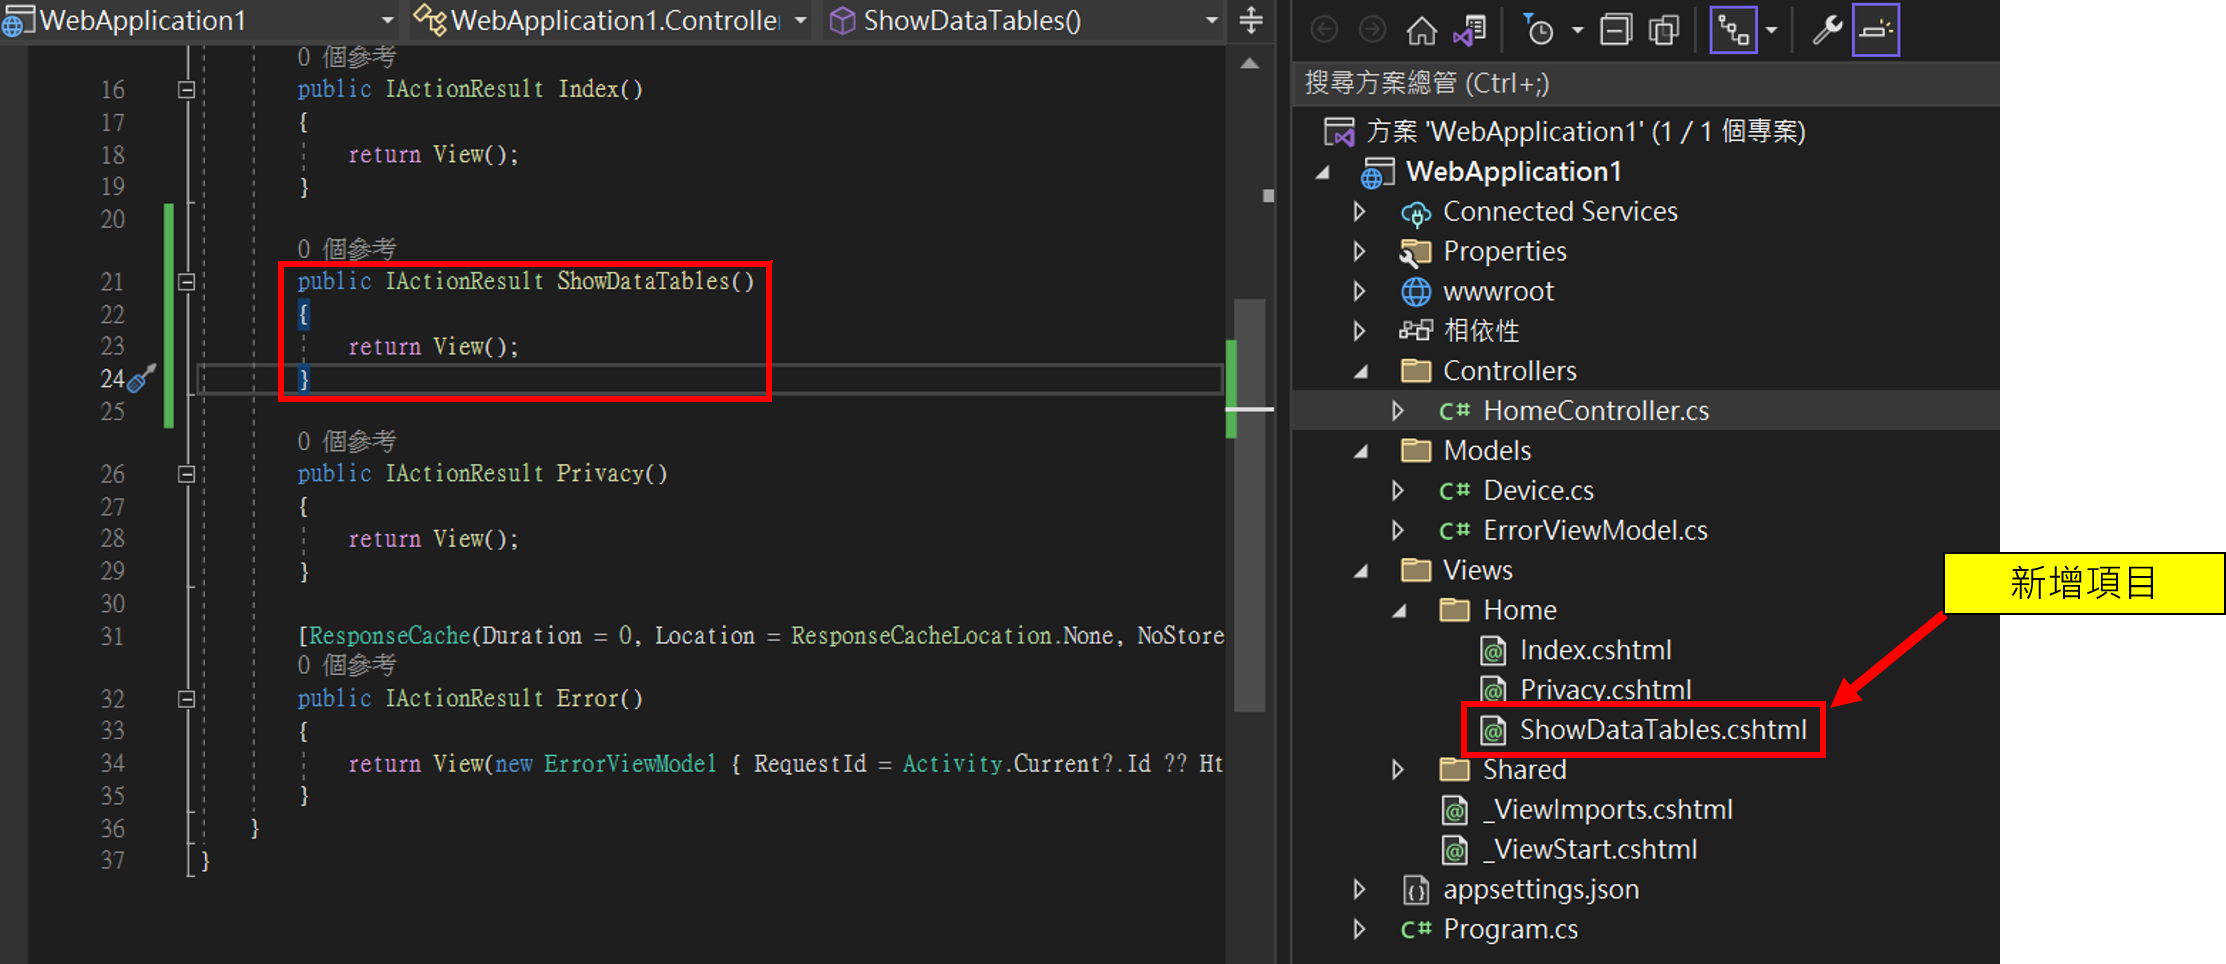
編輯View(HTML)
1
2
3
4
5
6
7
8
9
10
11
12
13
14
15
16
17
18
19
20
21
22
23
<link rel="stylesheet" href="https://cdn.datatables.net/1.11.3/css/jquery.dataTables.min.css">
<div class="row">
    <div class="col-12">
        <div class="card m-3">
            <div class="card-body">
                <div class="tb_div">
                    <table class="table table-hover table-bordered " id="thisTable" cellspacing="0" width="100%">
                        <thead class="table-info">
                            <tr>
                                <td>ID</td>
                                <td>DeviceTypeId</td>
                                <td>ItemName</td>
                                <td>ItemDescription</td>
                            </tr>
                        </thead>
                        <tbody class="tb_tbody">
                        </tbody>
                    </table>
                </div>
            </div>
        </div>
    </div>
</div>
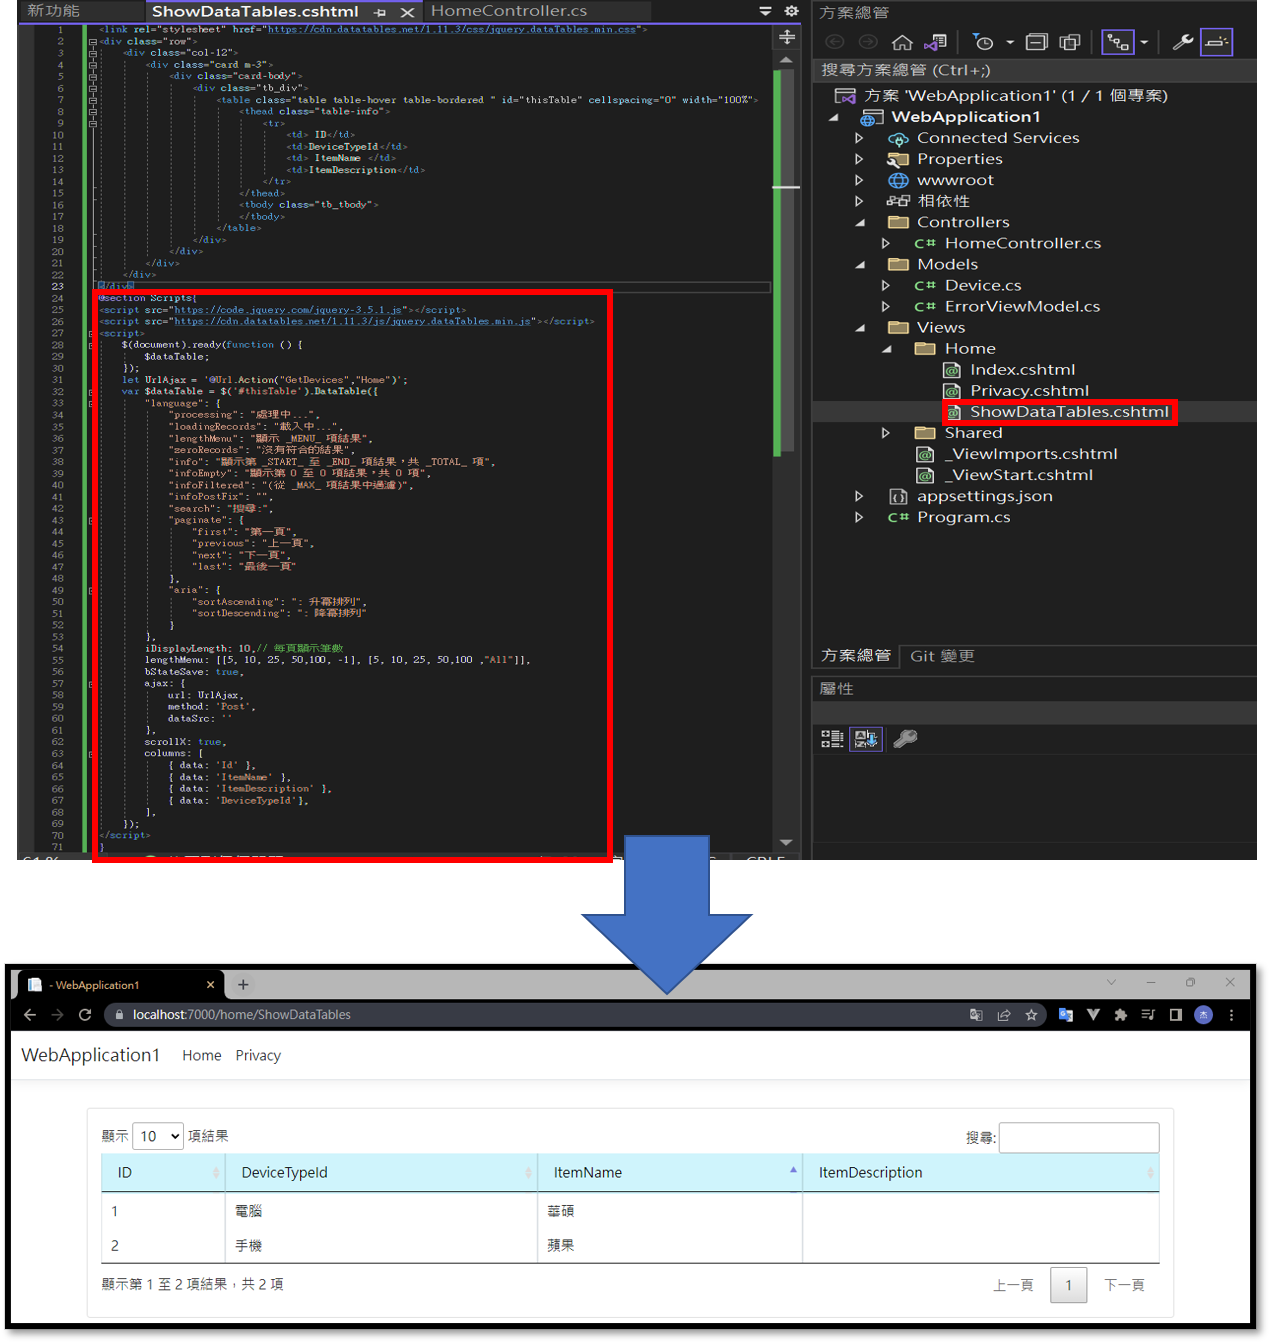
編輯View(JavaScript)
1
2
3
4
5
6
7
8
9
10
11
12
13
14
15
16
17
18
19
20
21
22
23
24
25
26
27
28
29
30
31
32
33
34
35
36
37
38
39
40
41
42
43
44
45
46
47
48
@section Scripts{
<script src="https://code.jquery.com/jquery-3.5.1.js"></script>
<script src="https://cdn.datatables.net/1.11.3/js/jquery.dataTables.min.js"></script>
<script>
    $(document).ready(function () {
        $dataTable;
    });
    let UrlAjax = '@Url.Action("GetDevices","Home")';
    var $dataTable = $('#thisTable').DataTable({
        "language": {
            "processing": "處理中...",
            "loadingRecords": "載入中...",
            "lengthMenu": "顯示 _MENU_ 項結果",
            "zeroRecords": "沒有符合的結果",
            "info": "顯示第 _START_ 至 _END_ 項結果,共 _TOTAL_ 項",
            "infoEmpty": "顯示第 0 至 0 項結果,共 0 項",
            "infoFiltered": "(從 _MAX_ 項結果中過濾)",
            "infoPostFix": "",
            "search": "搜尋:",
            "paginate": {
                "first": "第一頁",
                "previous": "上一頁",
                "next": "下一頁",
                "last": "最後一頁"
            },
            "aria": {
                "sortAscending": ": 升冪排列",
                "sortDescending": ": 降冪排列"
            }
        },
        iDisplayLength: 10,// 每頁顯示筆數
        lengthMenu: [[5, 10, 25, 50,100, -1], [5, 10, 25, 50,100 ,"All"]],
        bStateSave: true,
        ajax: {
            url: UrlAjax,
            method: 'Post',
            dataSrc: ''
        },
        scrollX: true,
        columns: [
            { data: 'Id' },
            { data: 'ItemName' },
            { data: 'ItemDescription' },
            { data: 'DeviceTypeId'},
        ],
    });
</script>
}
補充說明-src位置
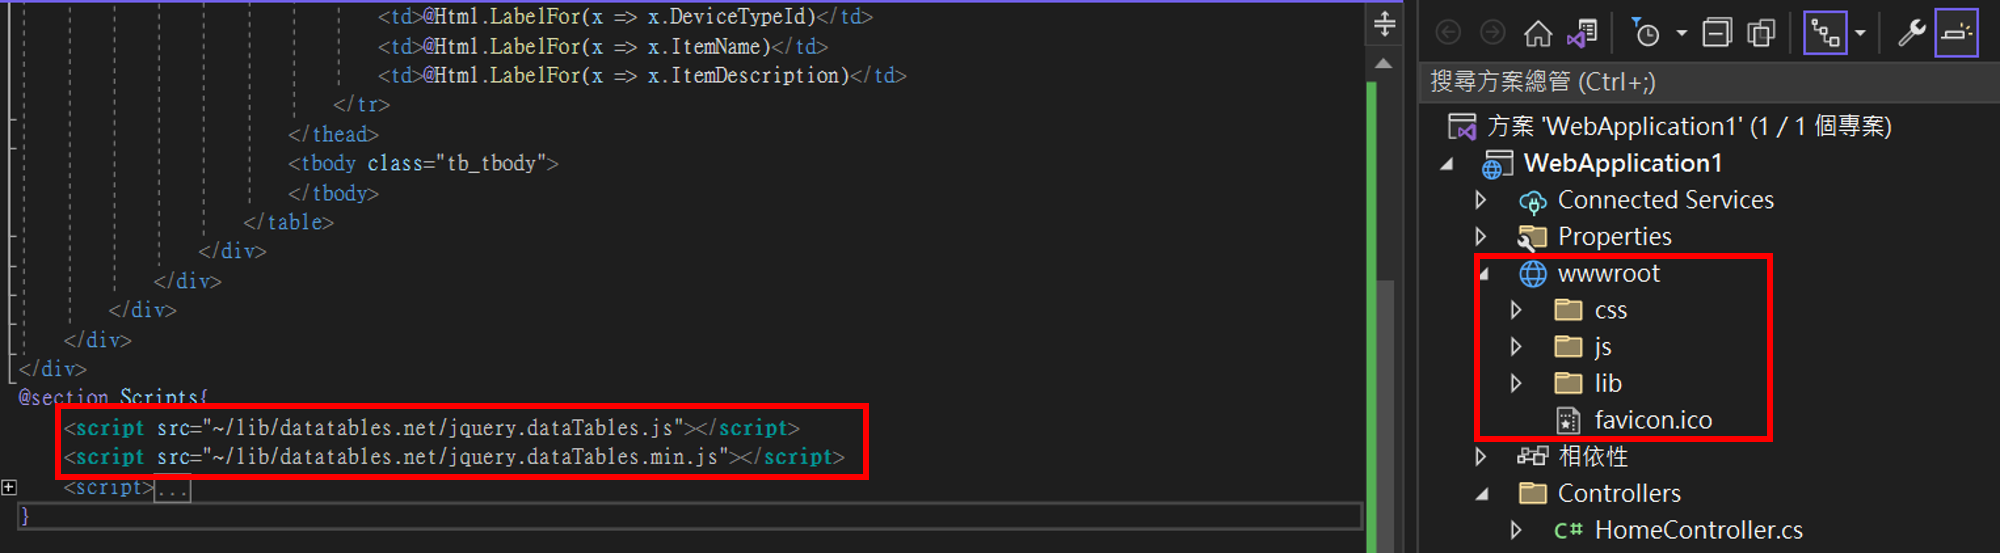
(ASP.NET CORE專案)可以把javaScript載到地端套用,使用src注意「~/」,指的是wwwroot這個目錄底下
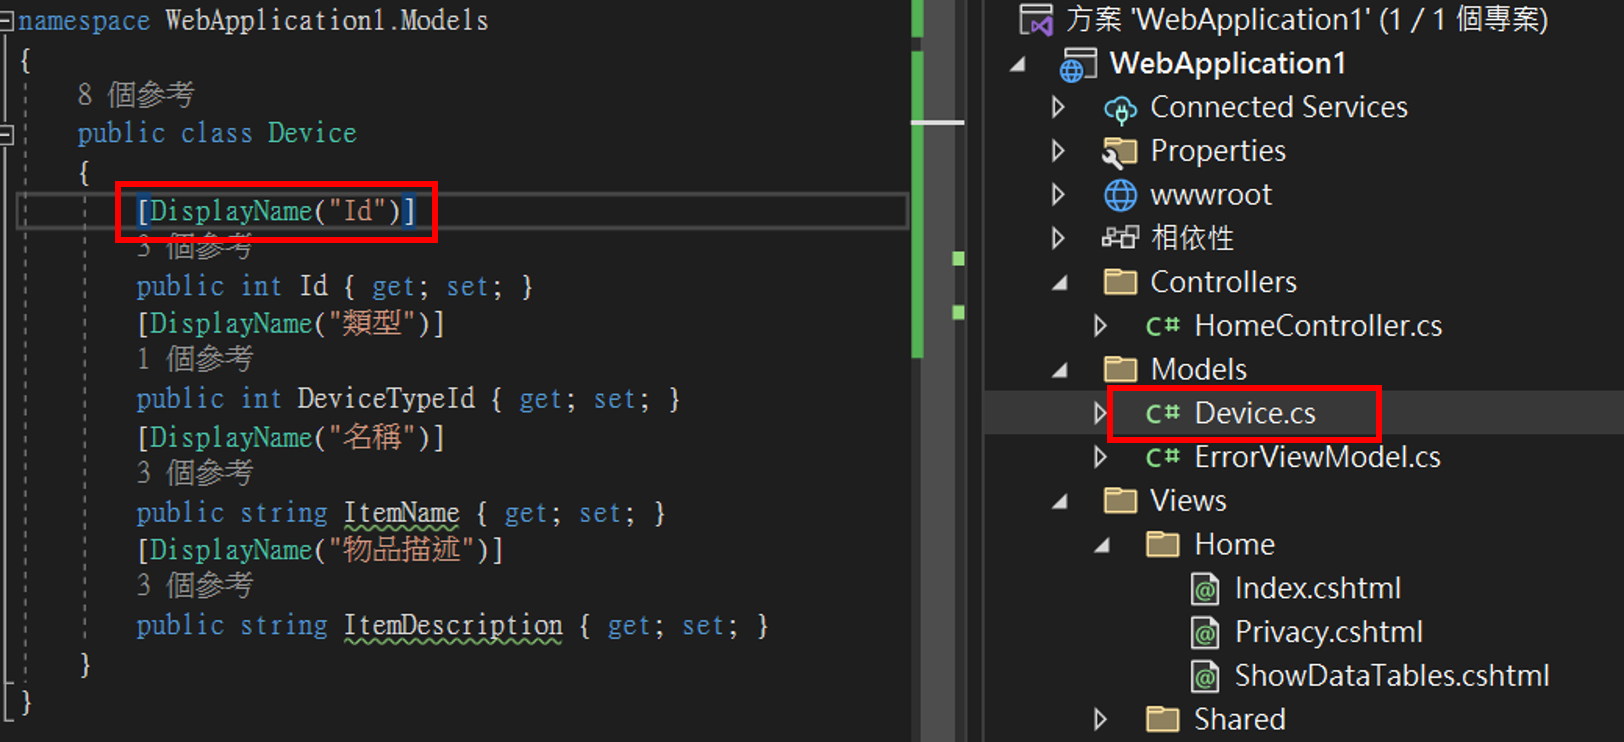
補充技巧-標題設計
在Model中維護Table標題的方式
在Model中加入DisplayName
1
2
3
4
5
6
7
8
9
10
11
public class Device
{
    [DisplayName("Id")]
    public int Id { get; set; }
    [DisplayName("類型")]
    public int DeviceTypeId { get; set; }
    [DisplayName("名稱")]
    public string ItemName { get; set; }
    [DisplayName("物品描述")]
    public string ItemDescription { get; set; }
}
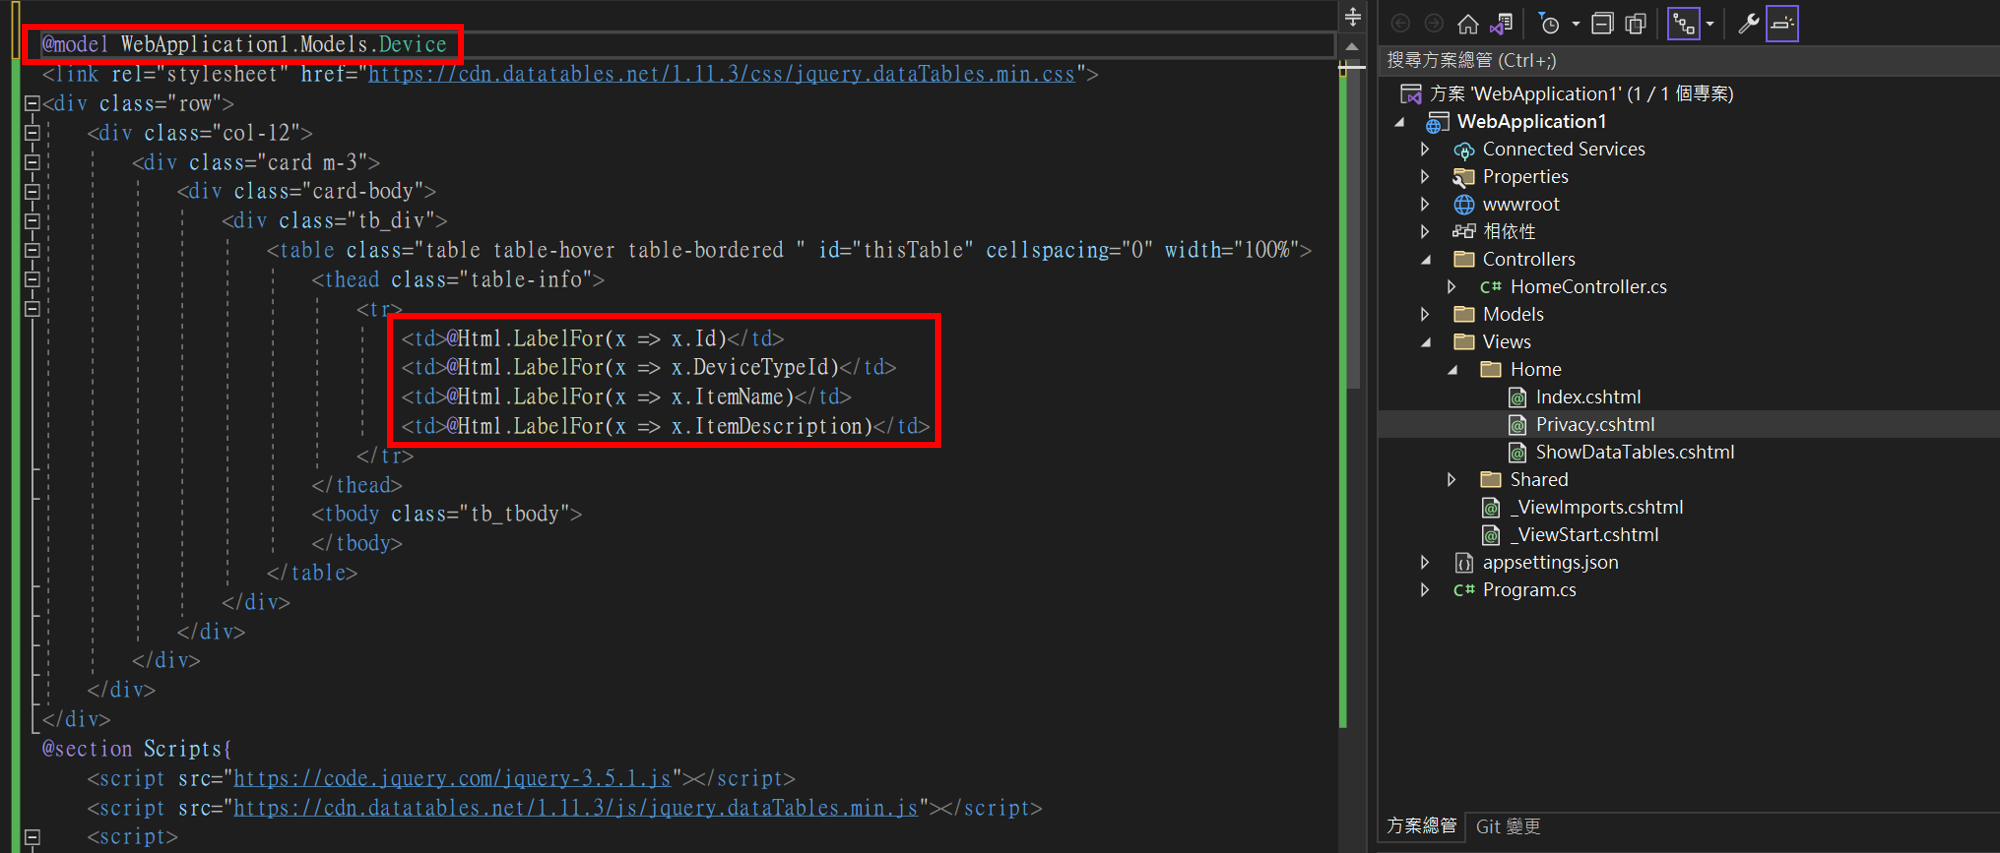
把Model傳進View裡面
View要添加Model,並引用html獲得DisplayName
1
2
3
4
5
6
7
8
9
10
11
12
13
14
15
16
17
18
19
20
21
22
23
24
@model WebApplication1.Models.Device
<link rel="stylesheet" href="https://cdn.datatables.net/1.11.3/css/jquery.dataTables.min.css">
<div class="row">
    <div class="col-12">
        <div class="card m-3">
            <div class="card-body">
                <div class="tb_div">
                    <table class="table table-hover table-bordered " id="thisTable" cellspacing="0" width="100%">
                        <thead class="table-info">
                            <tr>
                                <td>@Html.LabelFor(x => x.Id)</td>
                                <td>@Html.LabelFor(x => x.DeviceTypeId)</td>
                                <td>@Html.LabelFor(x => x.ItemName)</td>
                                <td>@Html.LabelFor(x => x.ItemDescription)</td>
                            </tr>
                        </thead>
                        <tbody class="tb_tbody">
                        </tbody>
                    </table>
                </div>
            </div>
        </div>
    </div>
</div>
最後就能在不改HTML的情況下,在Model維護標題名稱了

補充技巧-加入可以跳出Modal的button
使用對應bootstrap版本的Modal
https://getbootstrap.com/docs/5.3/components/modal/#how-it-works 檢查bootstrap版本的方式 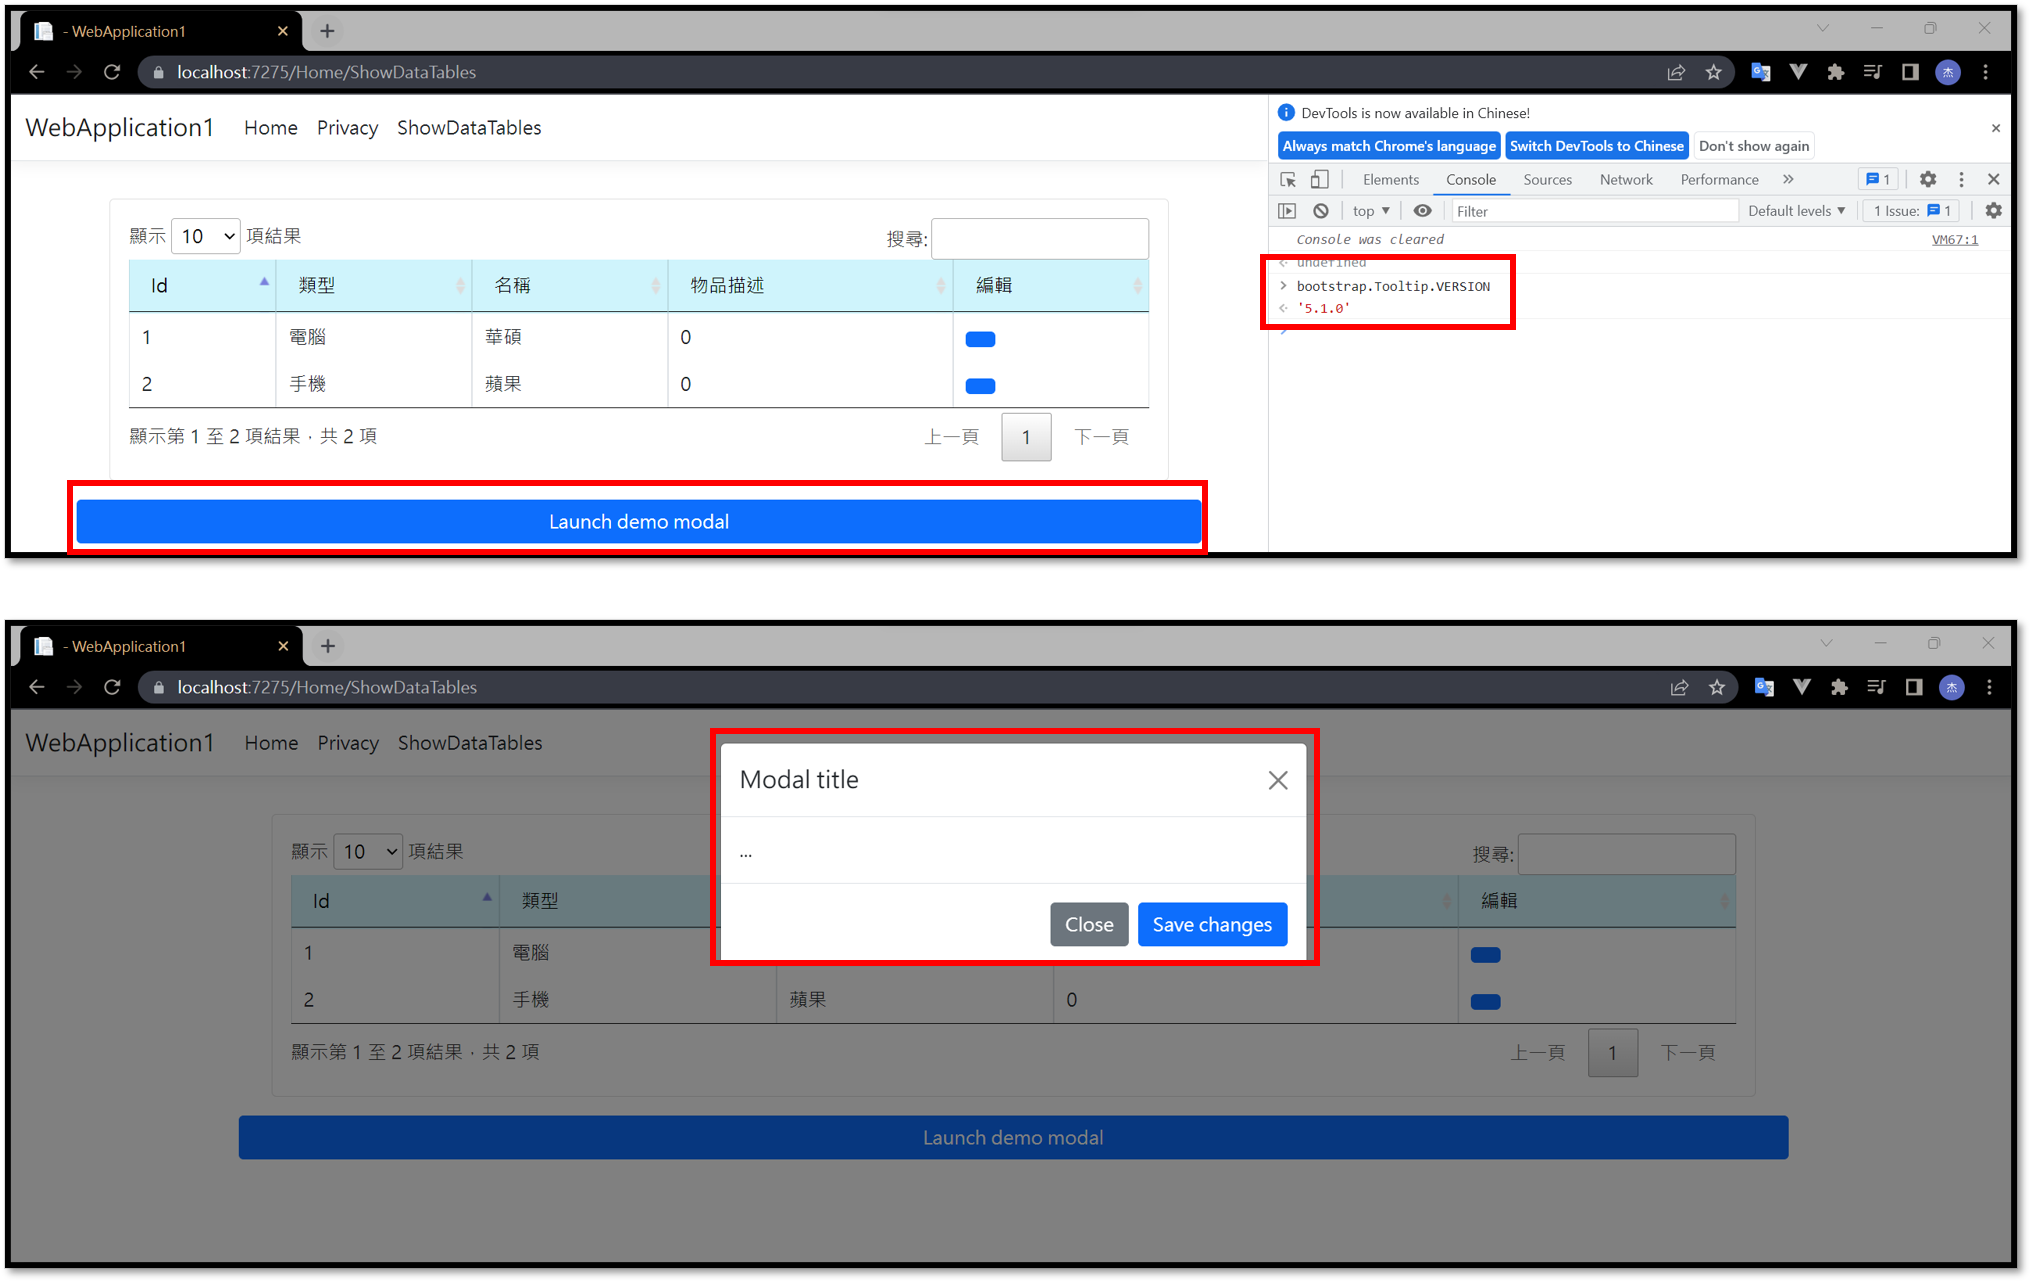
1
bootstrap.Tooltip.VERSION
確保Modal能正常使用
先確保在Table頁面能在點擊button後跳出Modal
1
2
3
4
5
6
7
8
9
10
11
12
13
14
15
16
17
18
19
20
21
22
23
<!-- Button trigger modal -->
<button type="button" class="btn btn-primary" data-bs-toggle="modal" data-bs-target="#exampleModal">
    Launch demo modal
</button>

<!-- Modal -->
<div class="modal fade" id="exampleModal" tabindex="-1" aria-labelledby="exampleModalLabel" aria-hidden="true">
    <div class="modal-dialog">
        <div class="modal-content">
            <div class="modal-header">
                <h1 class="modal-title fs-5" id="exampleModalLabel">Modal title</h1>
                <button type="button" class="btn-close" data-bs-dismiss="modal" aria-label="Close"></button>
            </div>
            <div class="modal-body">
                ...
            </div>
            <div class="modal-footer">
                <button type="button" class="btn btn-secondary" data-bs-dismiss="modal">Close</button>
                <button type="button" class="btn btn-primary">Save changes</button>
            </div>
        </div>
    </div>
</div>
加入編輯用的欄位

1
2
3
4
5
6
7
8
9
10
11
12
{
    data: 'Edit',
    render: function (data, type, row) {
        let $btn = $('<button>', {
            'class': 'btn btn-primary',
            'data-bs-toggle': 'modal',
            'data-bs-target': '#exampleModal',
        });
        console.log($btn[0].outerHTML);
        return $btn[0].outerHTML;
    }
}
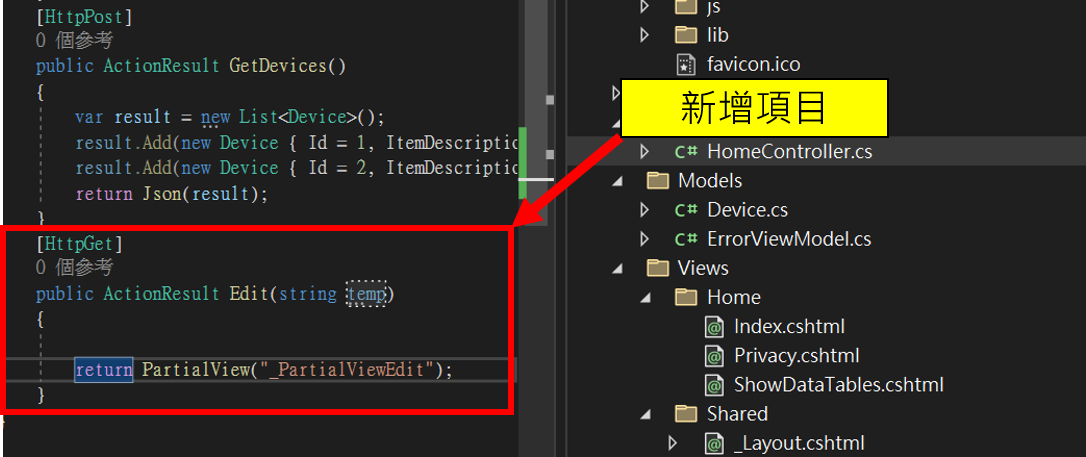
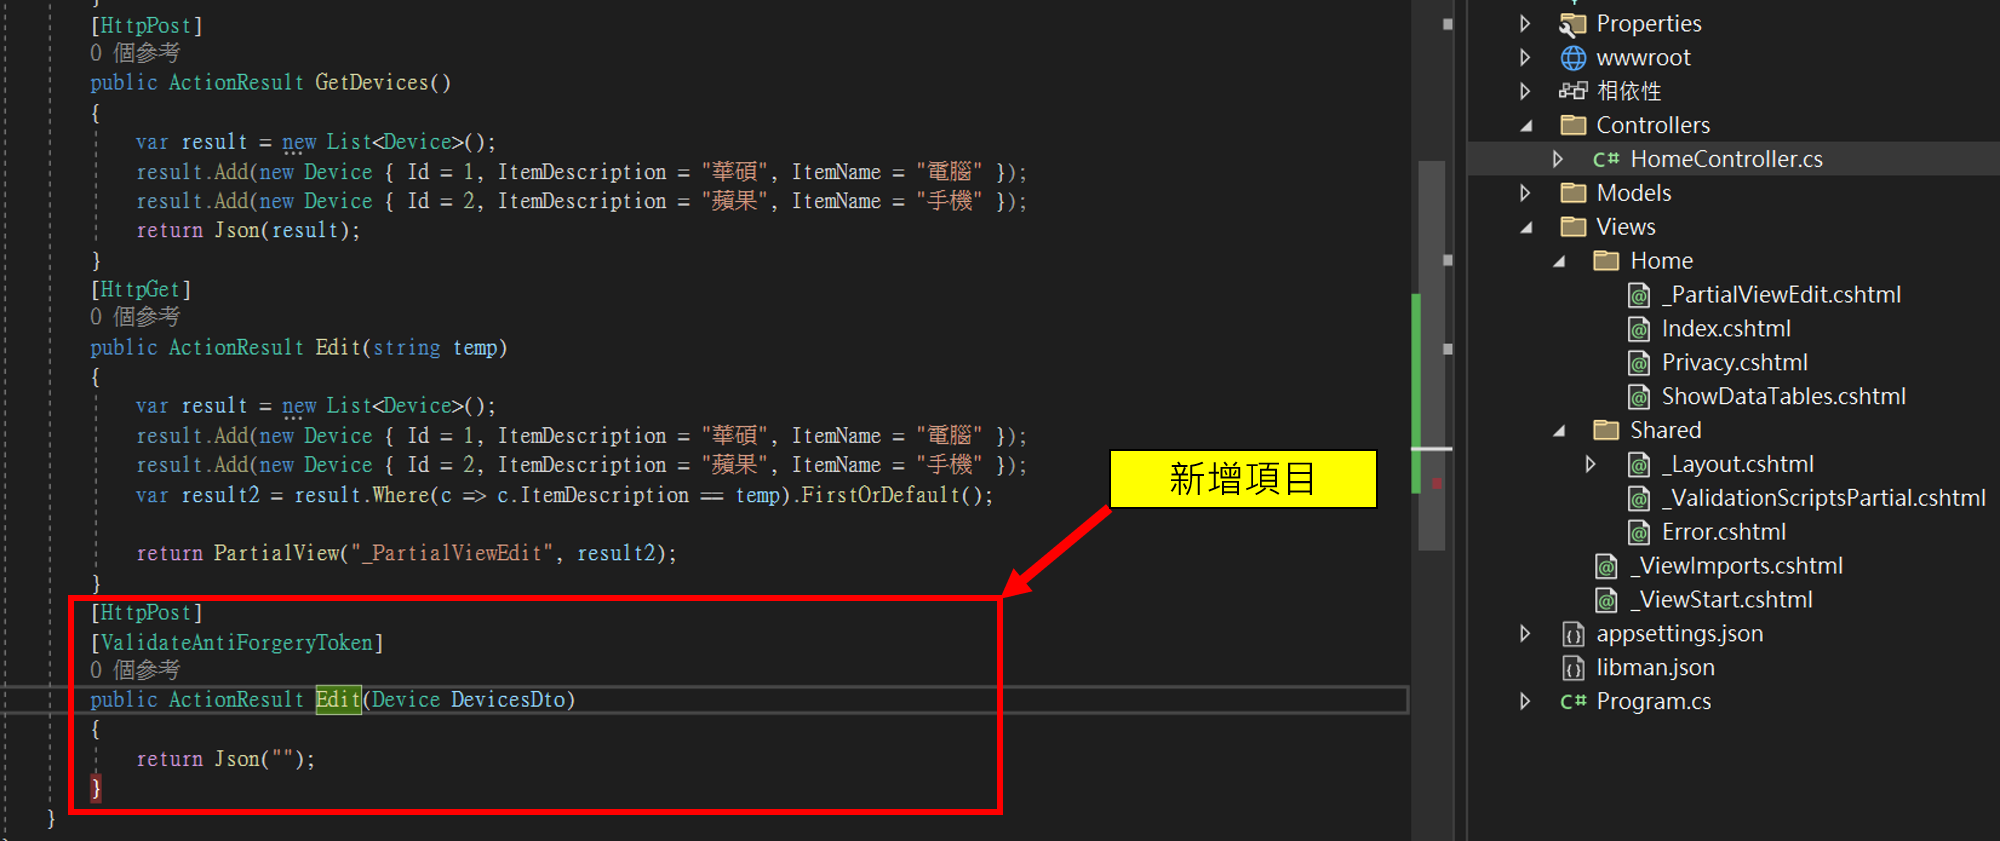
在PartialView維護編輯頁面
讓ActionResult能接收觸發的資料
先在Controller建立「觸發Button的資料時要傳遞的資料」的ActionResult
1
2
3
4
5
6
[HttpGet]
public ActionResult Edit(string temp)
{

    return PartialView("_PartialViewEdit");
}
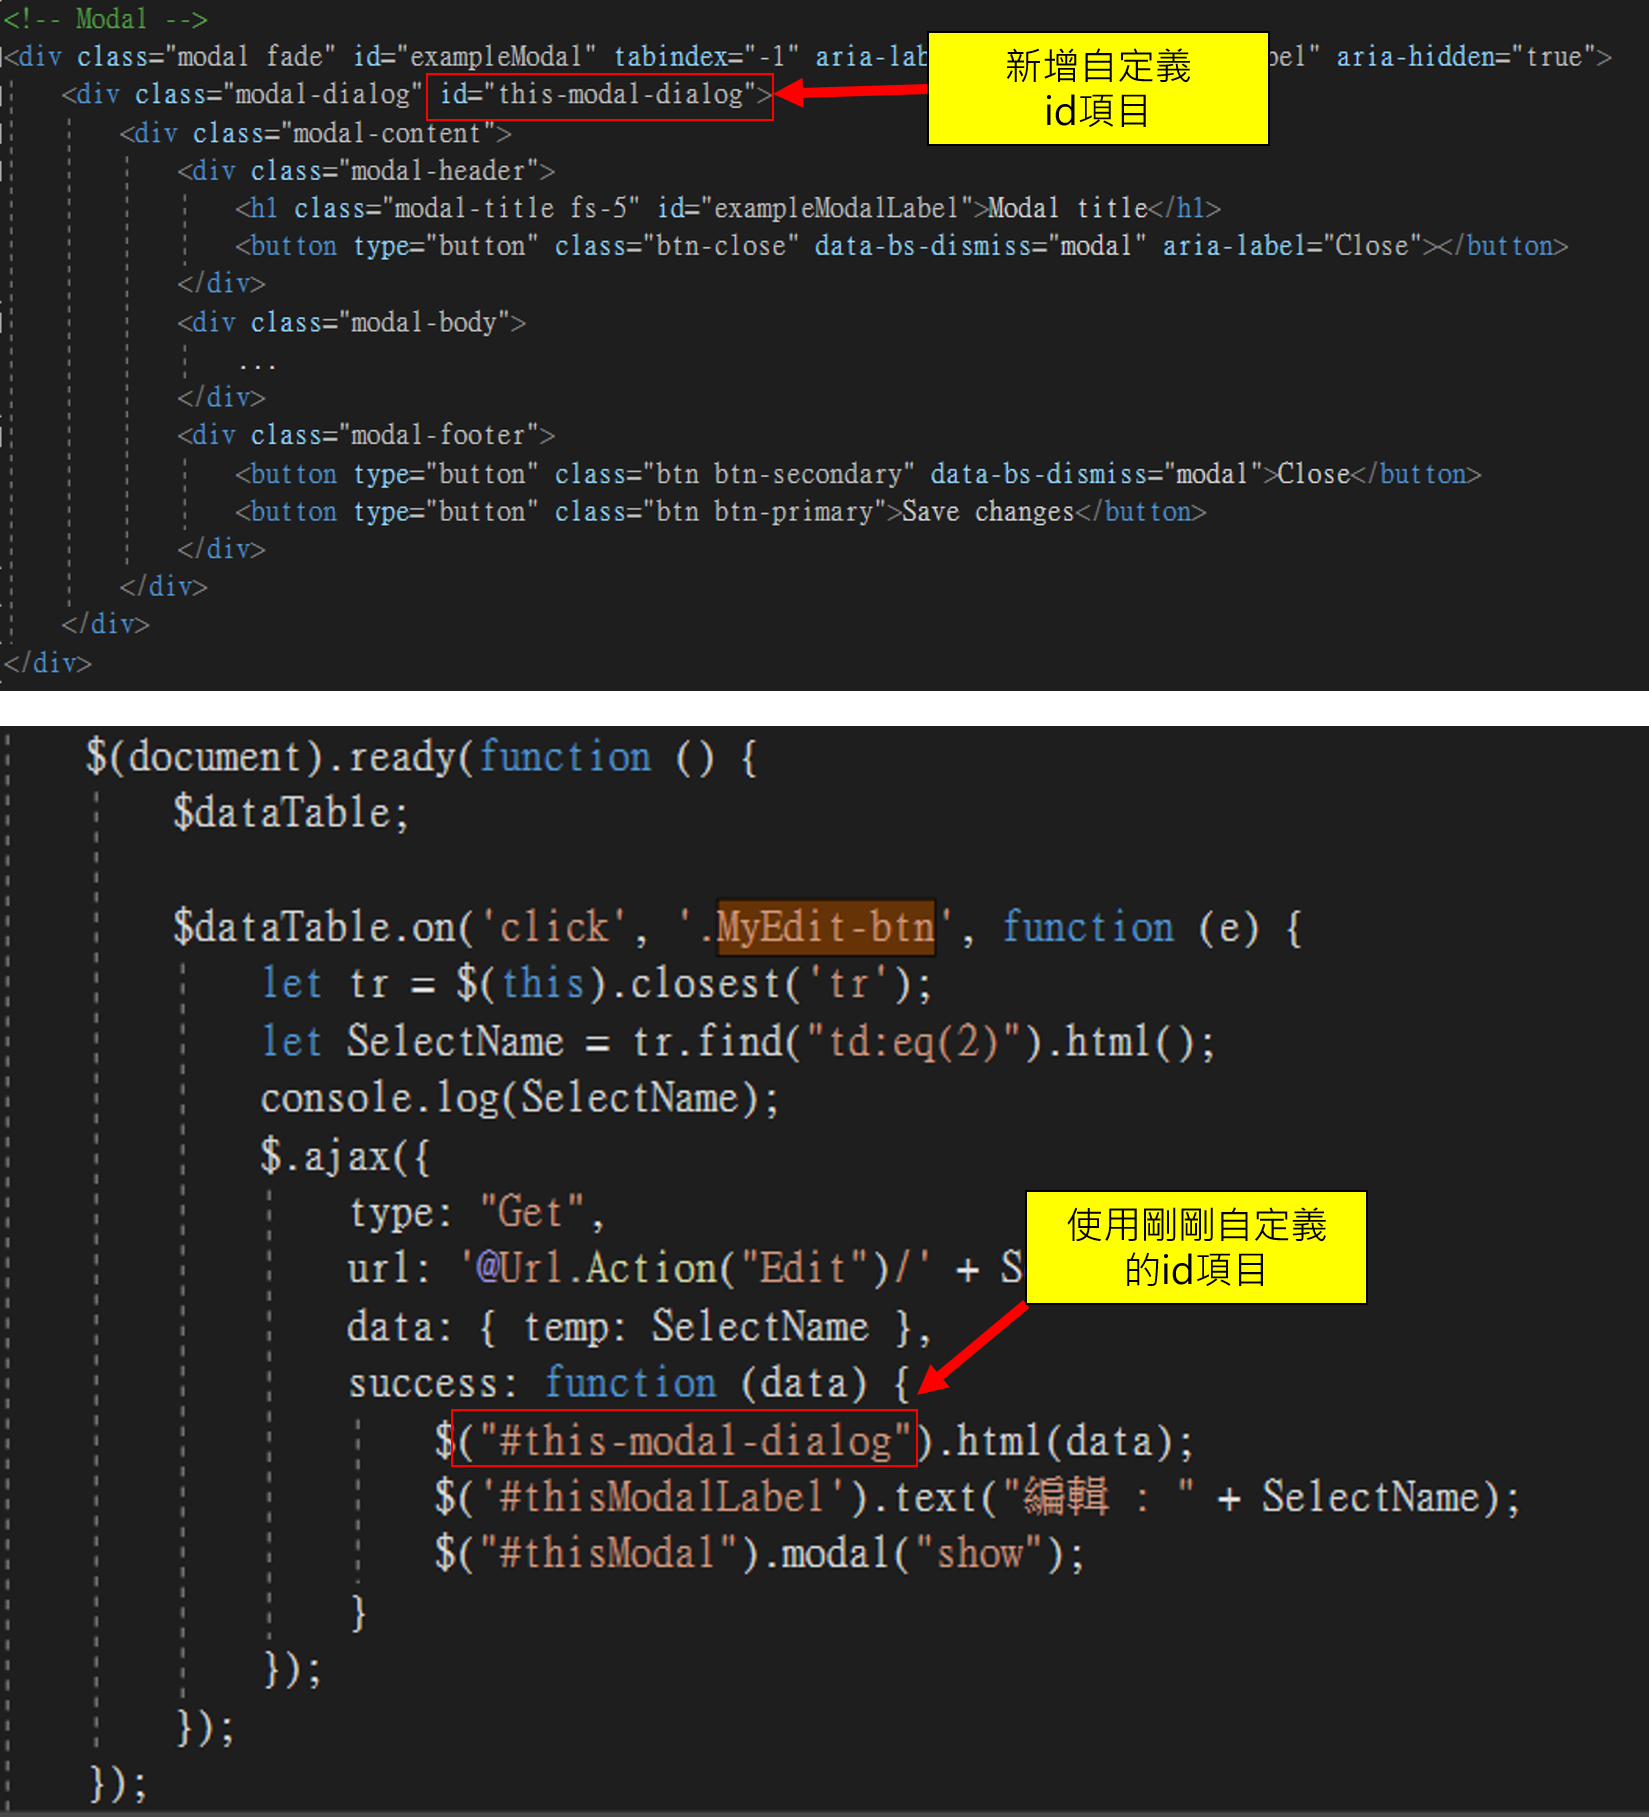
加入dataTable的click事件,並在Table的Button中,新增自定義Class
備註1: Url.Action回傳的是PartialView,在AJAX透過PartialView得到的資料是由HTML所組成的
備註2:「success: function (data)」 的data是透過PartialView回傳的Html
備註3:「$("#this-modal-dialog").html(data)」的html方法是用來取代html用的,所以參數塞的是html

1
2
3
4
5
6
7
8
9
10
11
12
13
14
15
16
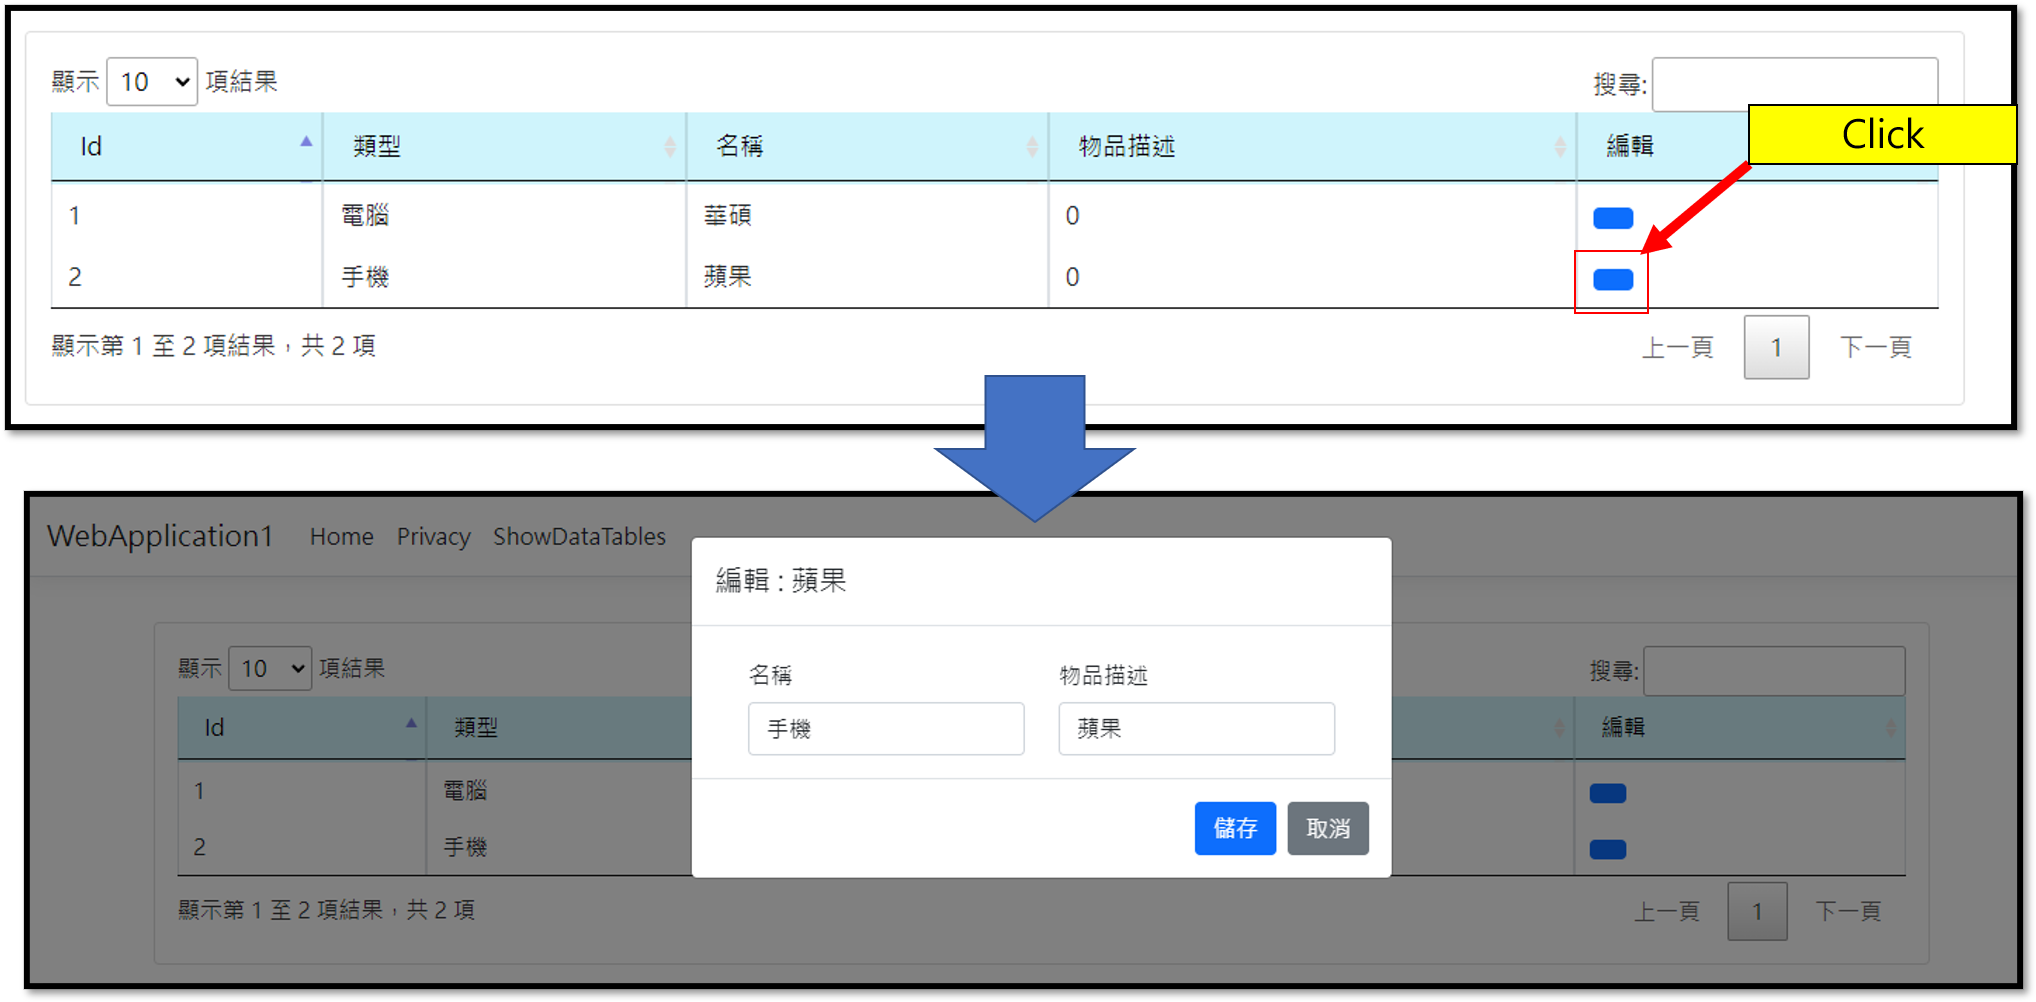
$dataTable.on('click', '.MyEdit-btn', function (e) {
let tr = $(this).closest('tr');
let SelectName = tr.find("td:eq(2)").html();
console.log(SelectName);
$.ajax({
type: "Get",
url: '@Url.Action("Edit")/' + SelectName,
data: { temp: SelectName },
success: function (data) {
$("#this-modal-dialog").html(data);
$('#thisModalLabel').text("編輯 : " + SelectName);
$("#thisModal").modal("show");
}
});
});
});
備註td:eq(2):裡面的2代表行數,自行變更
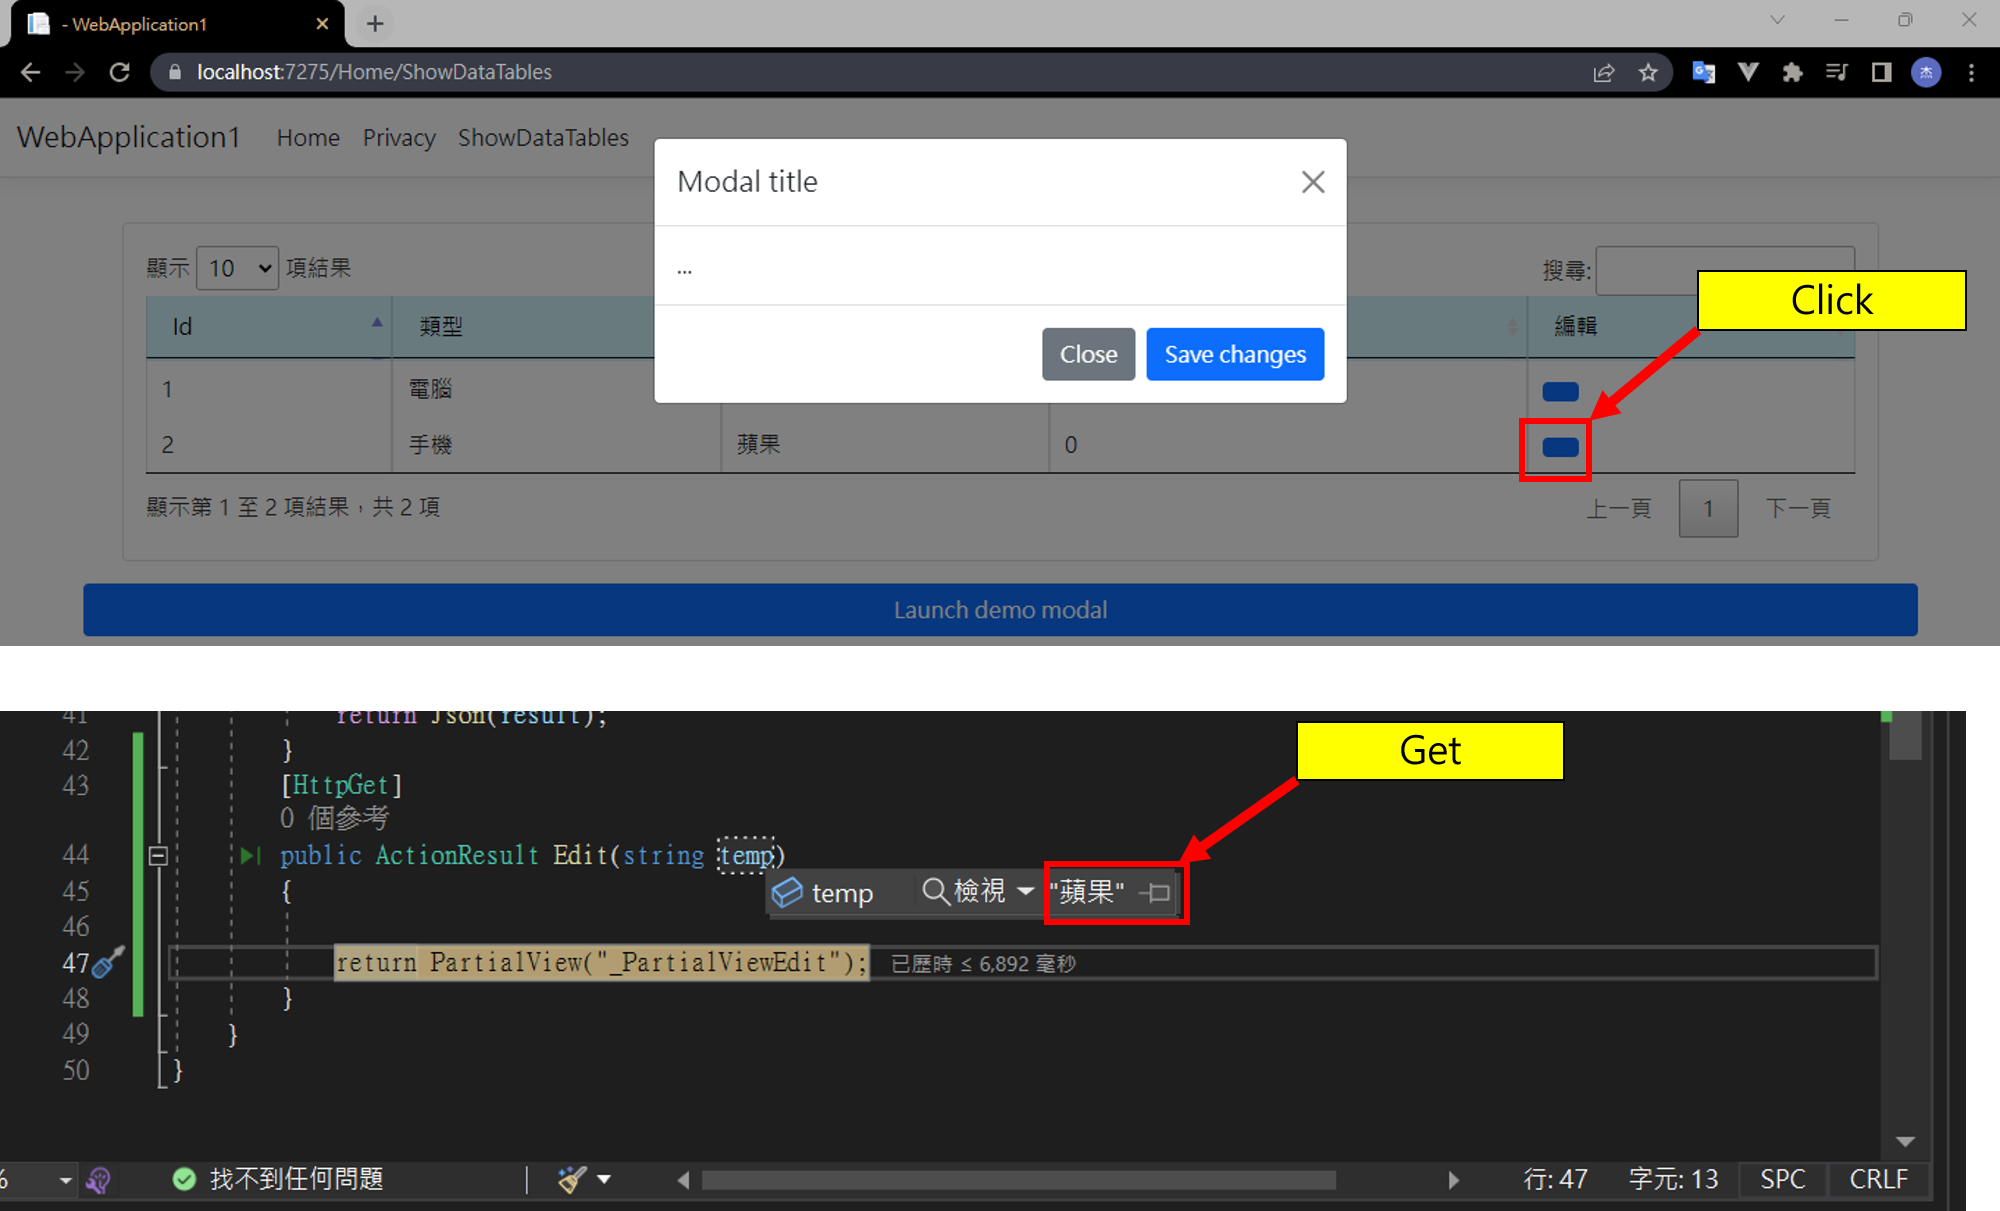
然後先執行專案,下中斷點,要確定能取得Button觸發時的資料
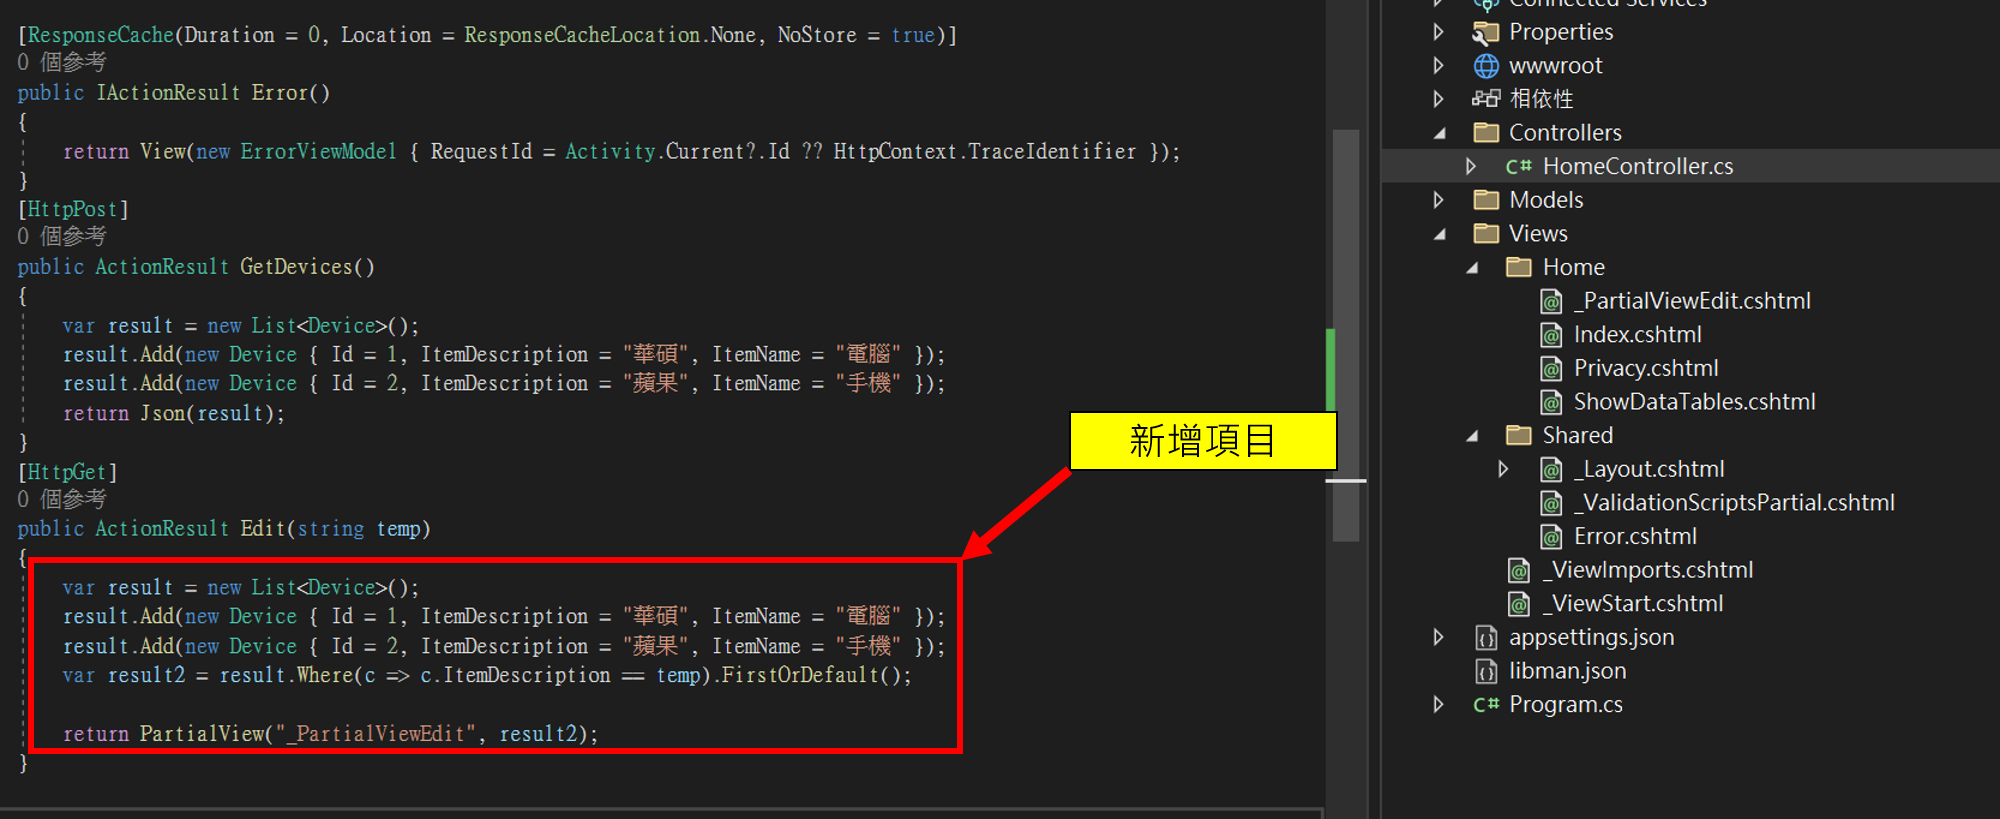
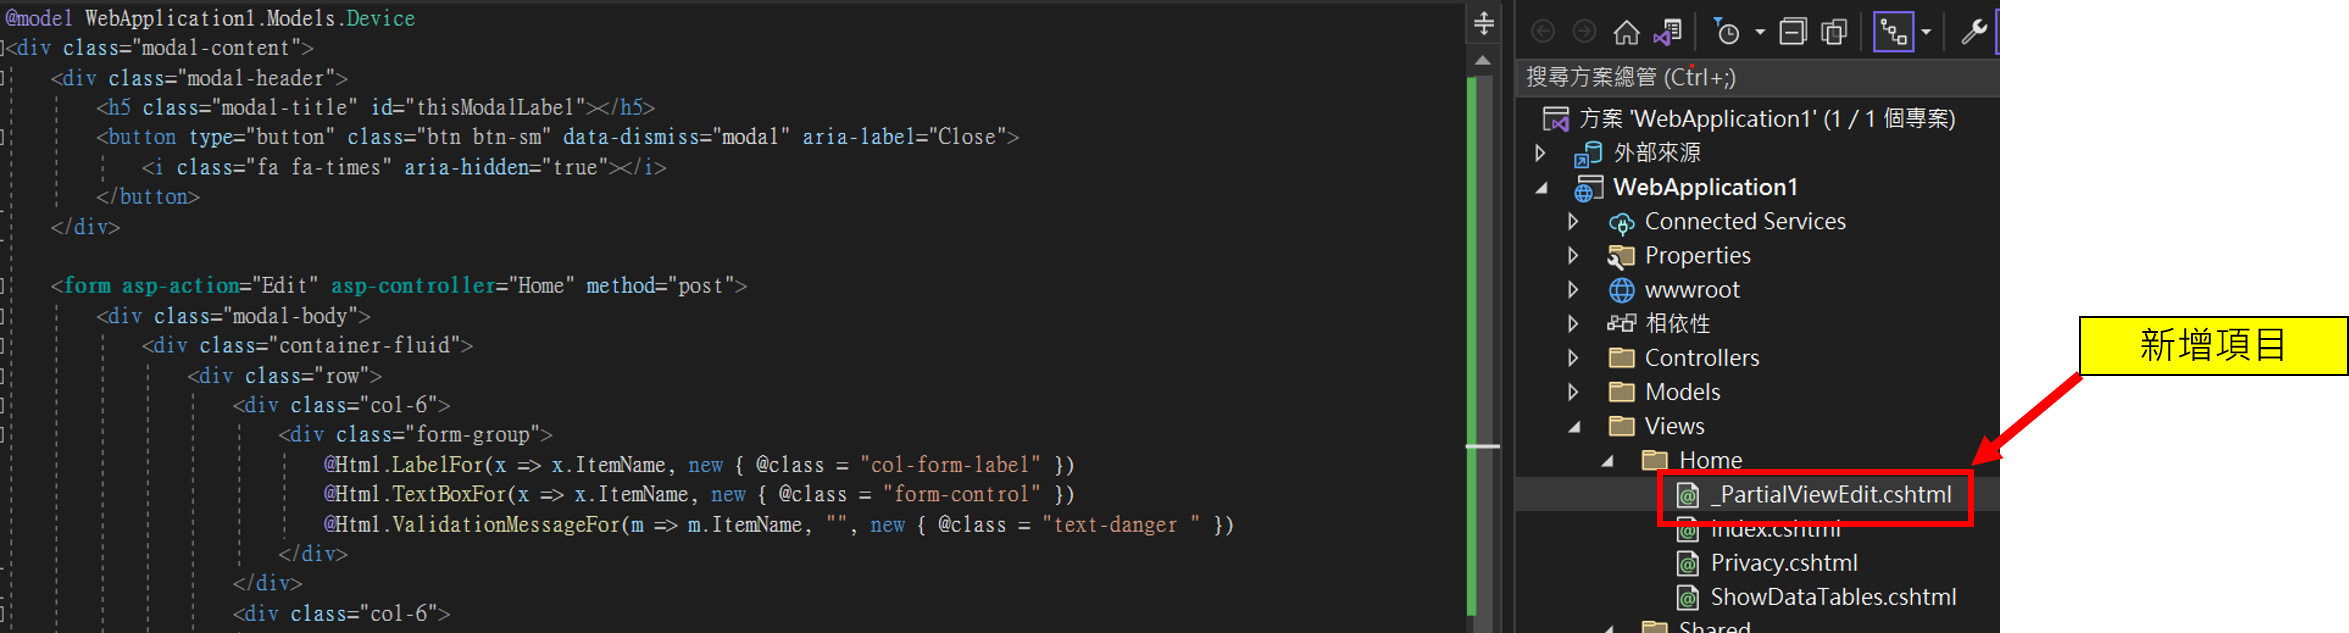
建立PartialView
加入要傳遞給PartialView顯示的資料,將Edit的Method改為以下
1
2
3
4
5
6
7
8
9
10
[HttpGet]
public ActionResult Edit(string temp)
{
    var result = new List<Device>();
    result.Add(new Device { Id = 1, ItemDescription = "華碩", ItemName = "電腦" });
    result.Add(new Device { Id = 2, ItemDescription = "蘋果", ItemName = "手機" });
    var result2 = result.Where(c => c.ItemDescription == temp).FirstOrDefault();

    return PartialView("_PartialViewEdit", result2);
}
建立PartialView
1
2
3
4
5
6
7
8
9
10
11
12
13
14
15
16
17
18
19
20
21
22
23
24
25
26
27
28
29
30
31
32
33
34
35
@model WebApplication1.Models.Device
<div class="modal-content">
    <div class="modal-header">
        <h5 class="modal-title" id="thisModalLabel"></h5>
        <button type="button" class="btn btn-sm" data-dismiss="modal" aria-label="Close">
            <i class="fa fa-times" aria-hidden="true"></i>
        </button>
    </div>

    <form asp-action="Edit" asp-controller="Home" method="post">
        <div class="modal-body">
            <div class="container-fluid">
                <div class="row">
                    <div class="col-6">
                        <div class="form-group">
                            @Html.LabelFor(x => x.ItemName, new { @class = "col-form-label" })
                            @Html.TextBoxFor(x => x.ItemName, new { @class = "form-control" })
                            @Html.ValidationMessageFor(m => m.ItemName, "", new { @class = "text-danger " })
                        </div>
                    </div>
                    <div class="col-6">
                        <div class="form-group">
                            @Html.LabelFor(x => x.ItemDescription, new { @class = "col-form-label" })
                            @Html.TextBoxFor(x => x.ItemDescription, new Dictionary<string, object> { { "class ", "form-control" } })
                        </div>
                    </div>
                </div>
            </div>
        </div>
        <div class="modal-footer">
            <button type="submit" class="btn btn-primary">儲存</button>
            <button type="button" class="btn btn-secondary" data-dismiss="modal">取消</button>
        </div>
    </form >
</div>
備註ASP.Net Core用的是Form
備註ASP.Net Framework用的是Ajax.BeginForm
結果呈現
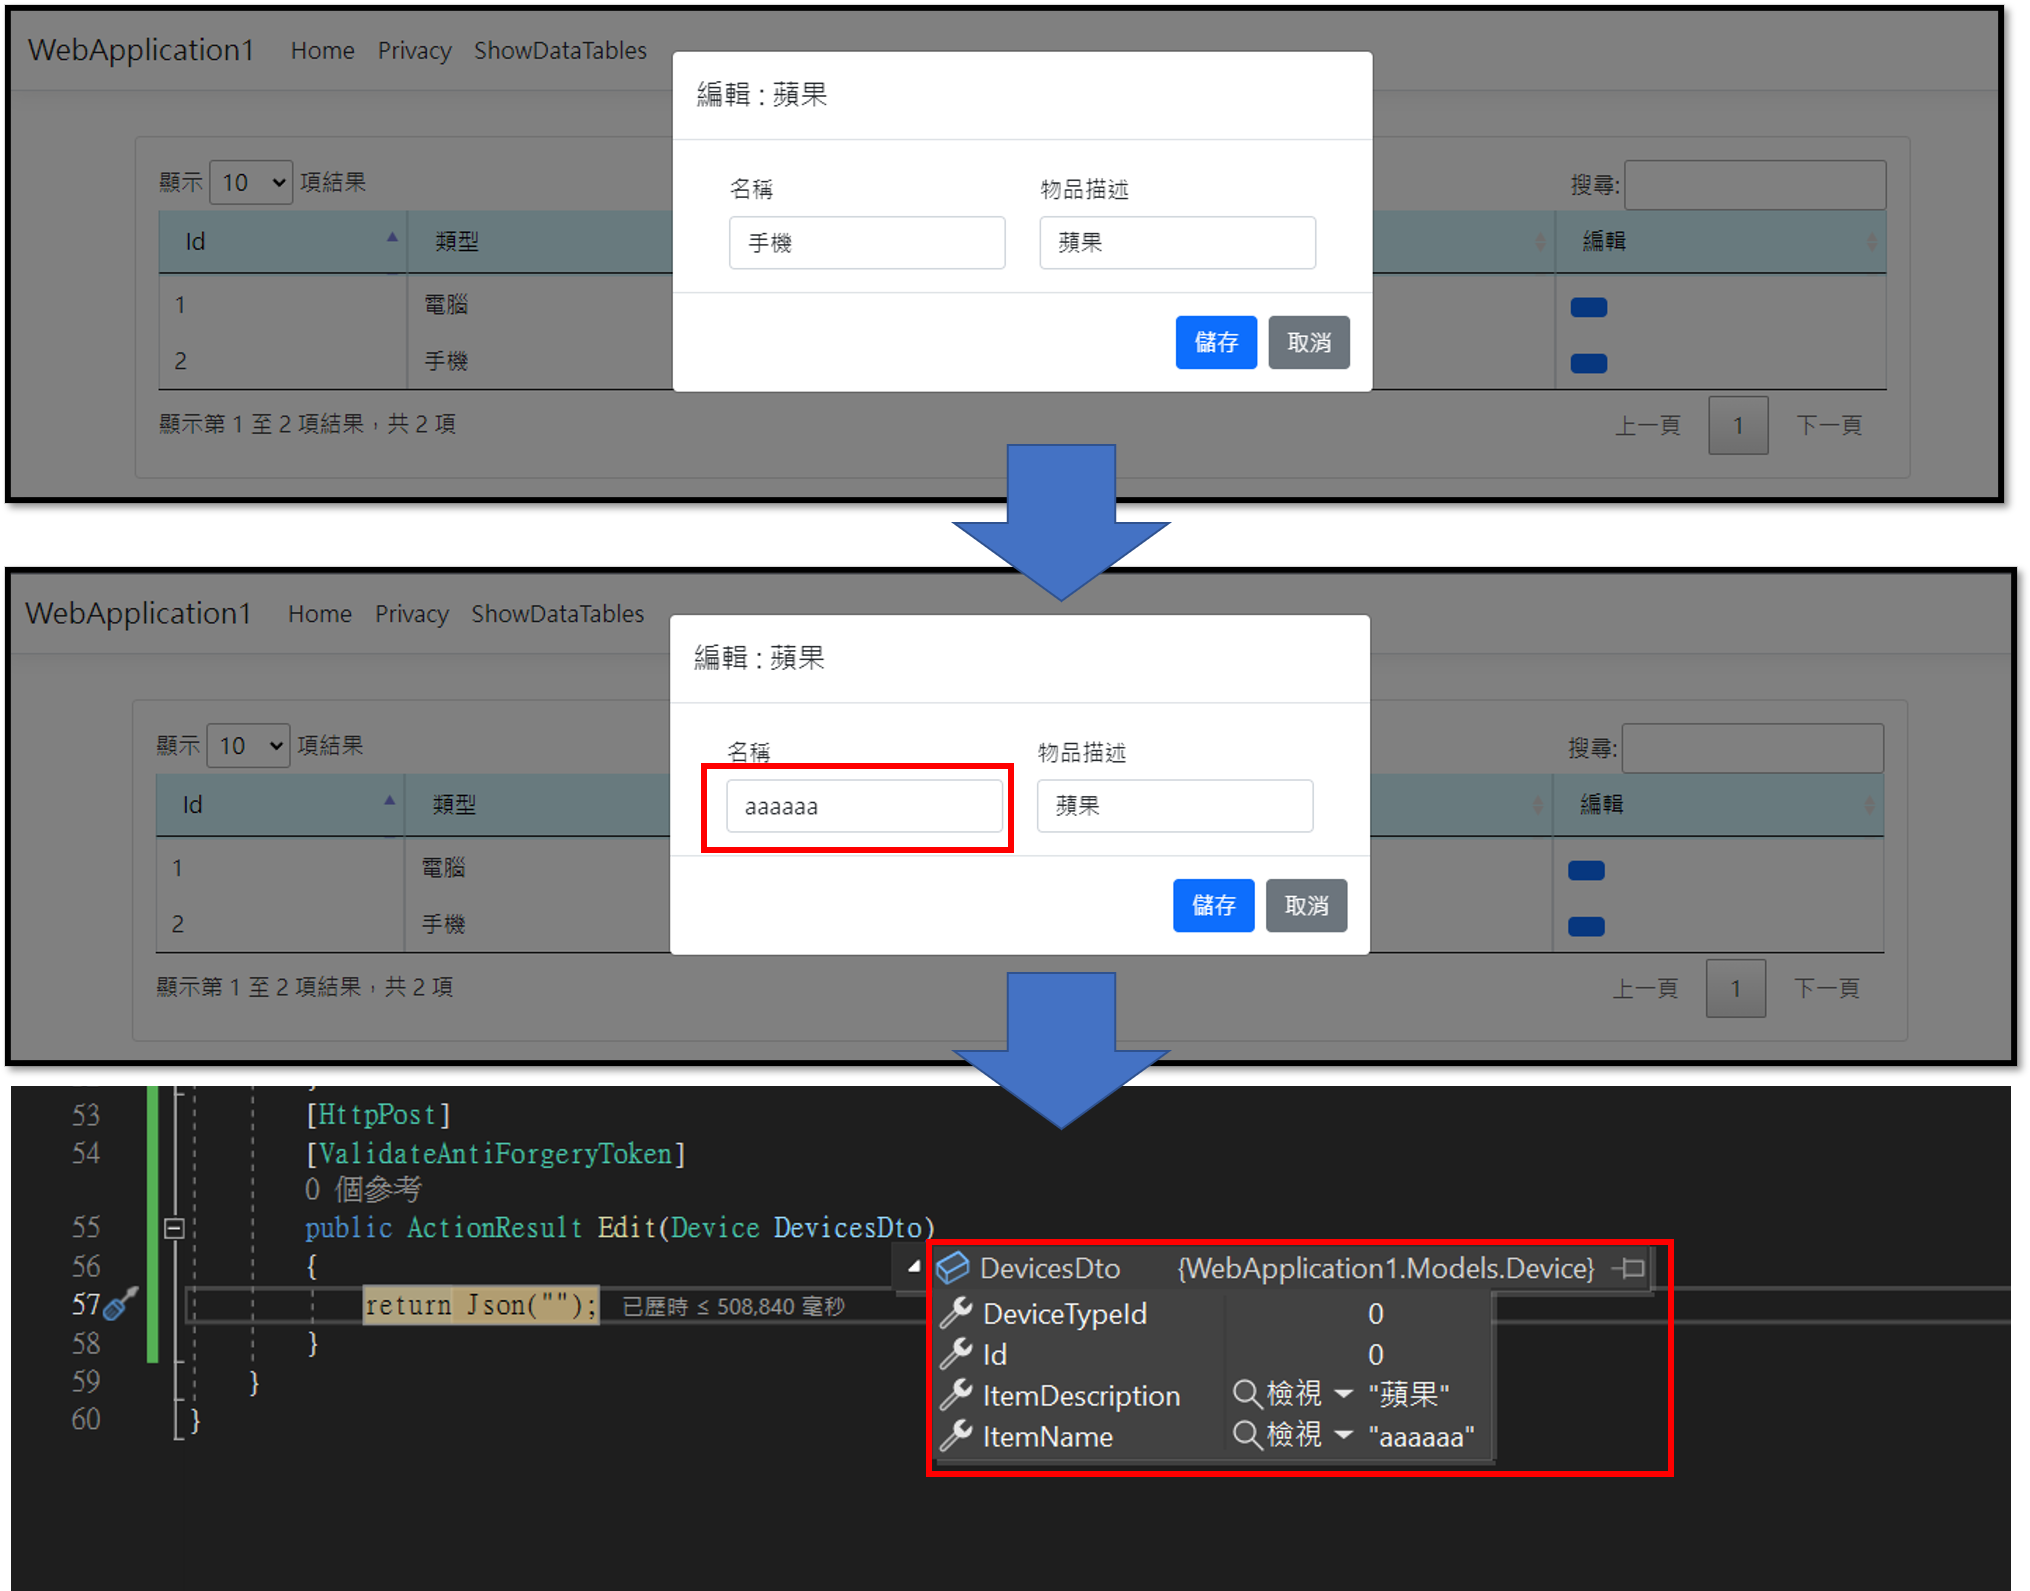
加入儲存驗證
ASP.NET Core中,PartialView的資料不用變更,Controller添加一段驗證的程式碼就好了
這段主要是確保按下儲存之後,資料能送到C#進行資料庫操作處理更新
1
2
3
4
5
6
[HttpPost]
[ValidateAntiForgeryToken]
public ActionResult Edit(Device DevicesDto)
{
    return RedirectToAction("ShowDataTables");
}
資料驗證呈現
GitHub
https://github.com/digamana/NetCoreDatatablesDemoRepo
參考
https://datatables.net/ https://getbootstrap.com/docs/5.3/components/modal/#how-it-works